
Tags
After the holidays I fell into the vortex of helping my teenage son prepare for a dual art exhibition with a friend which opened last Sunday in DC. Thinking it was just going to be a small affair I was a little taken aback when I saw the size of this space. My son was going to have to paint A LOT for the next month. He was fine with this and I started to fret.


While he was busy painting I was busy figuring out how to do the framing. I learned that gorilla glue and blocks were indispensable for floating art on a wall. Also, shims turned out to be my best friend. I will do a post on that at a later date.
Now on to pleated ribbon trim.

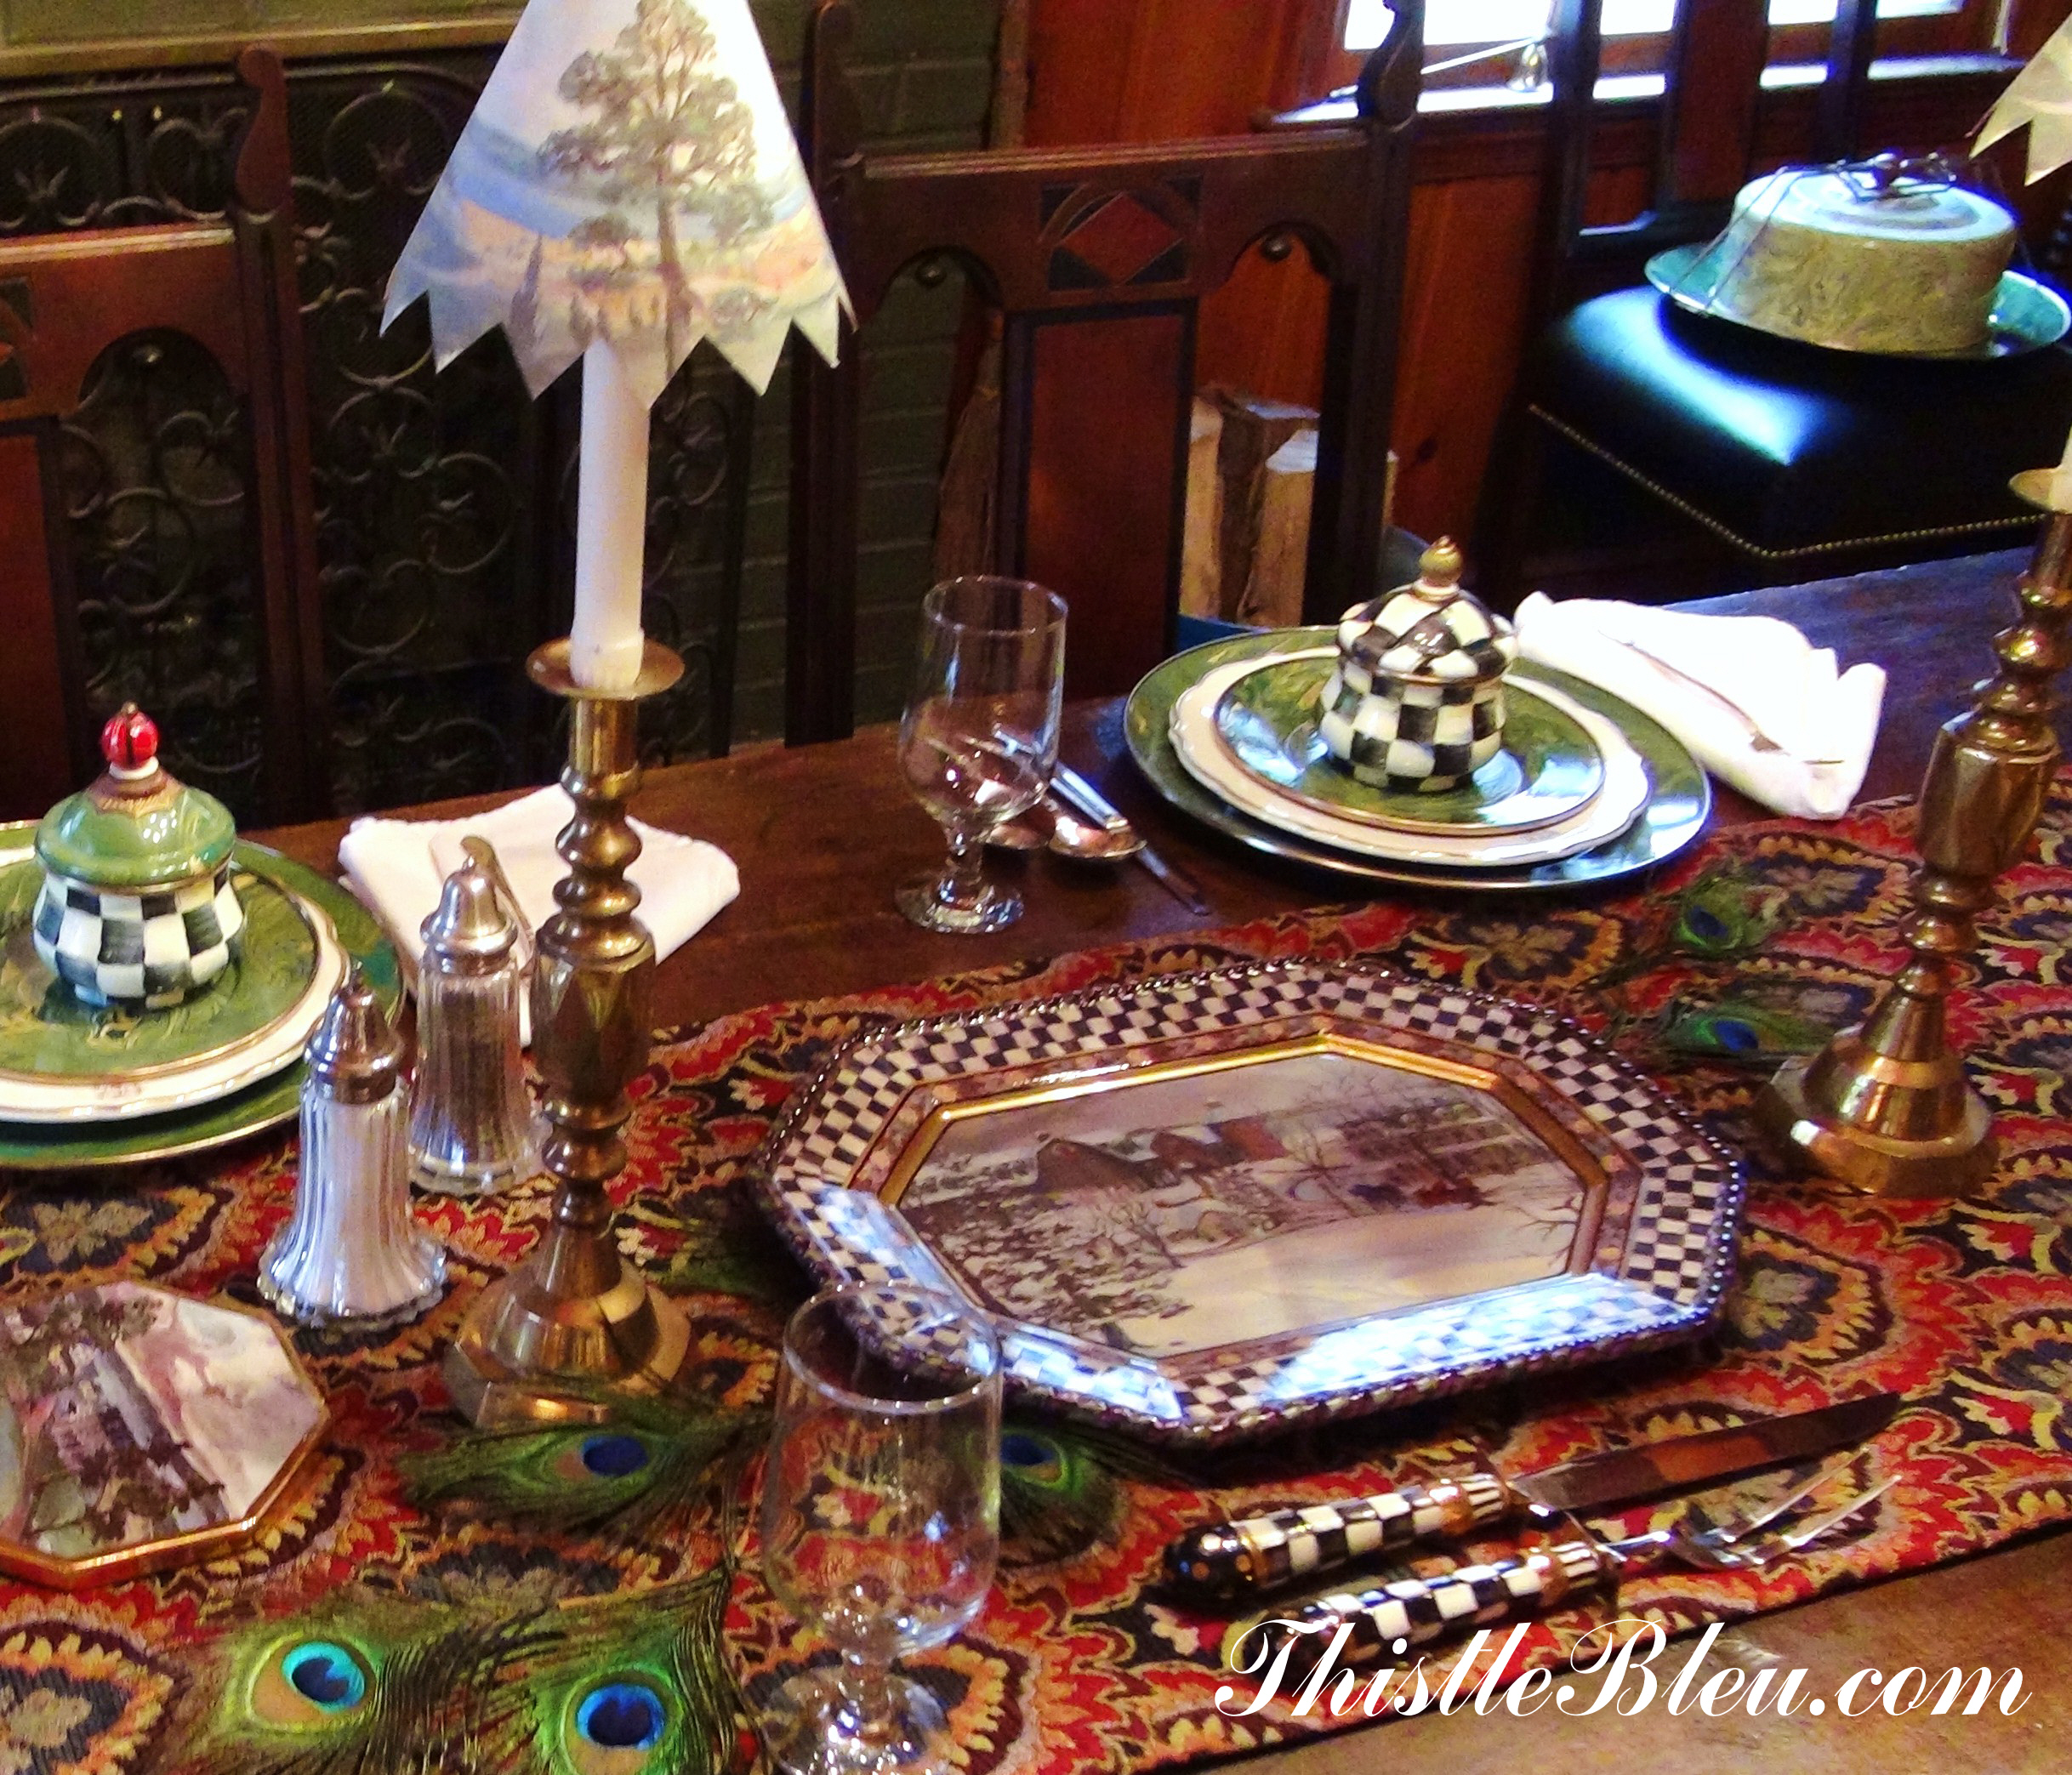
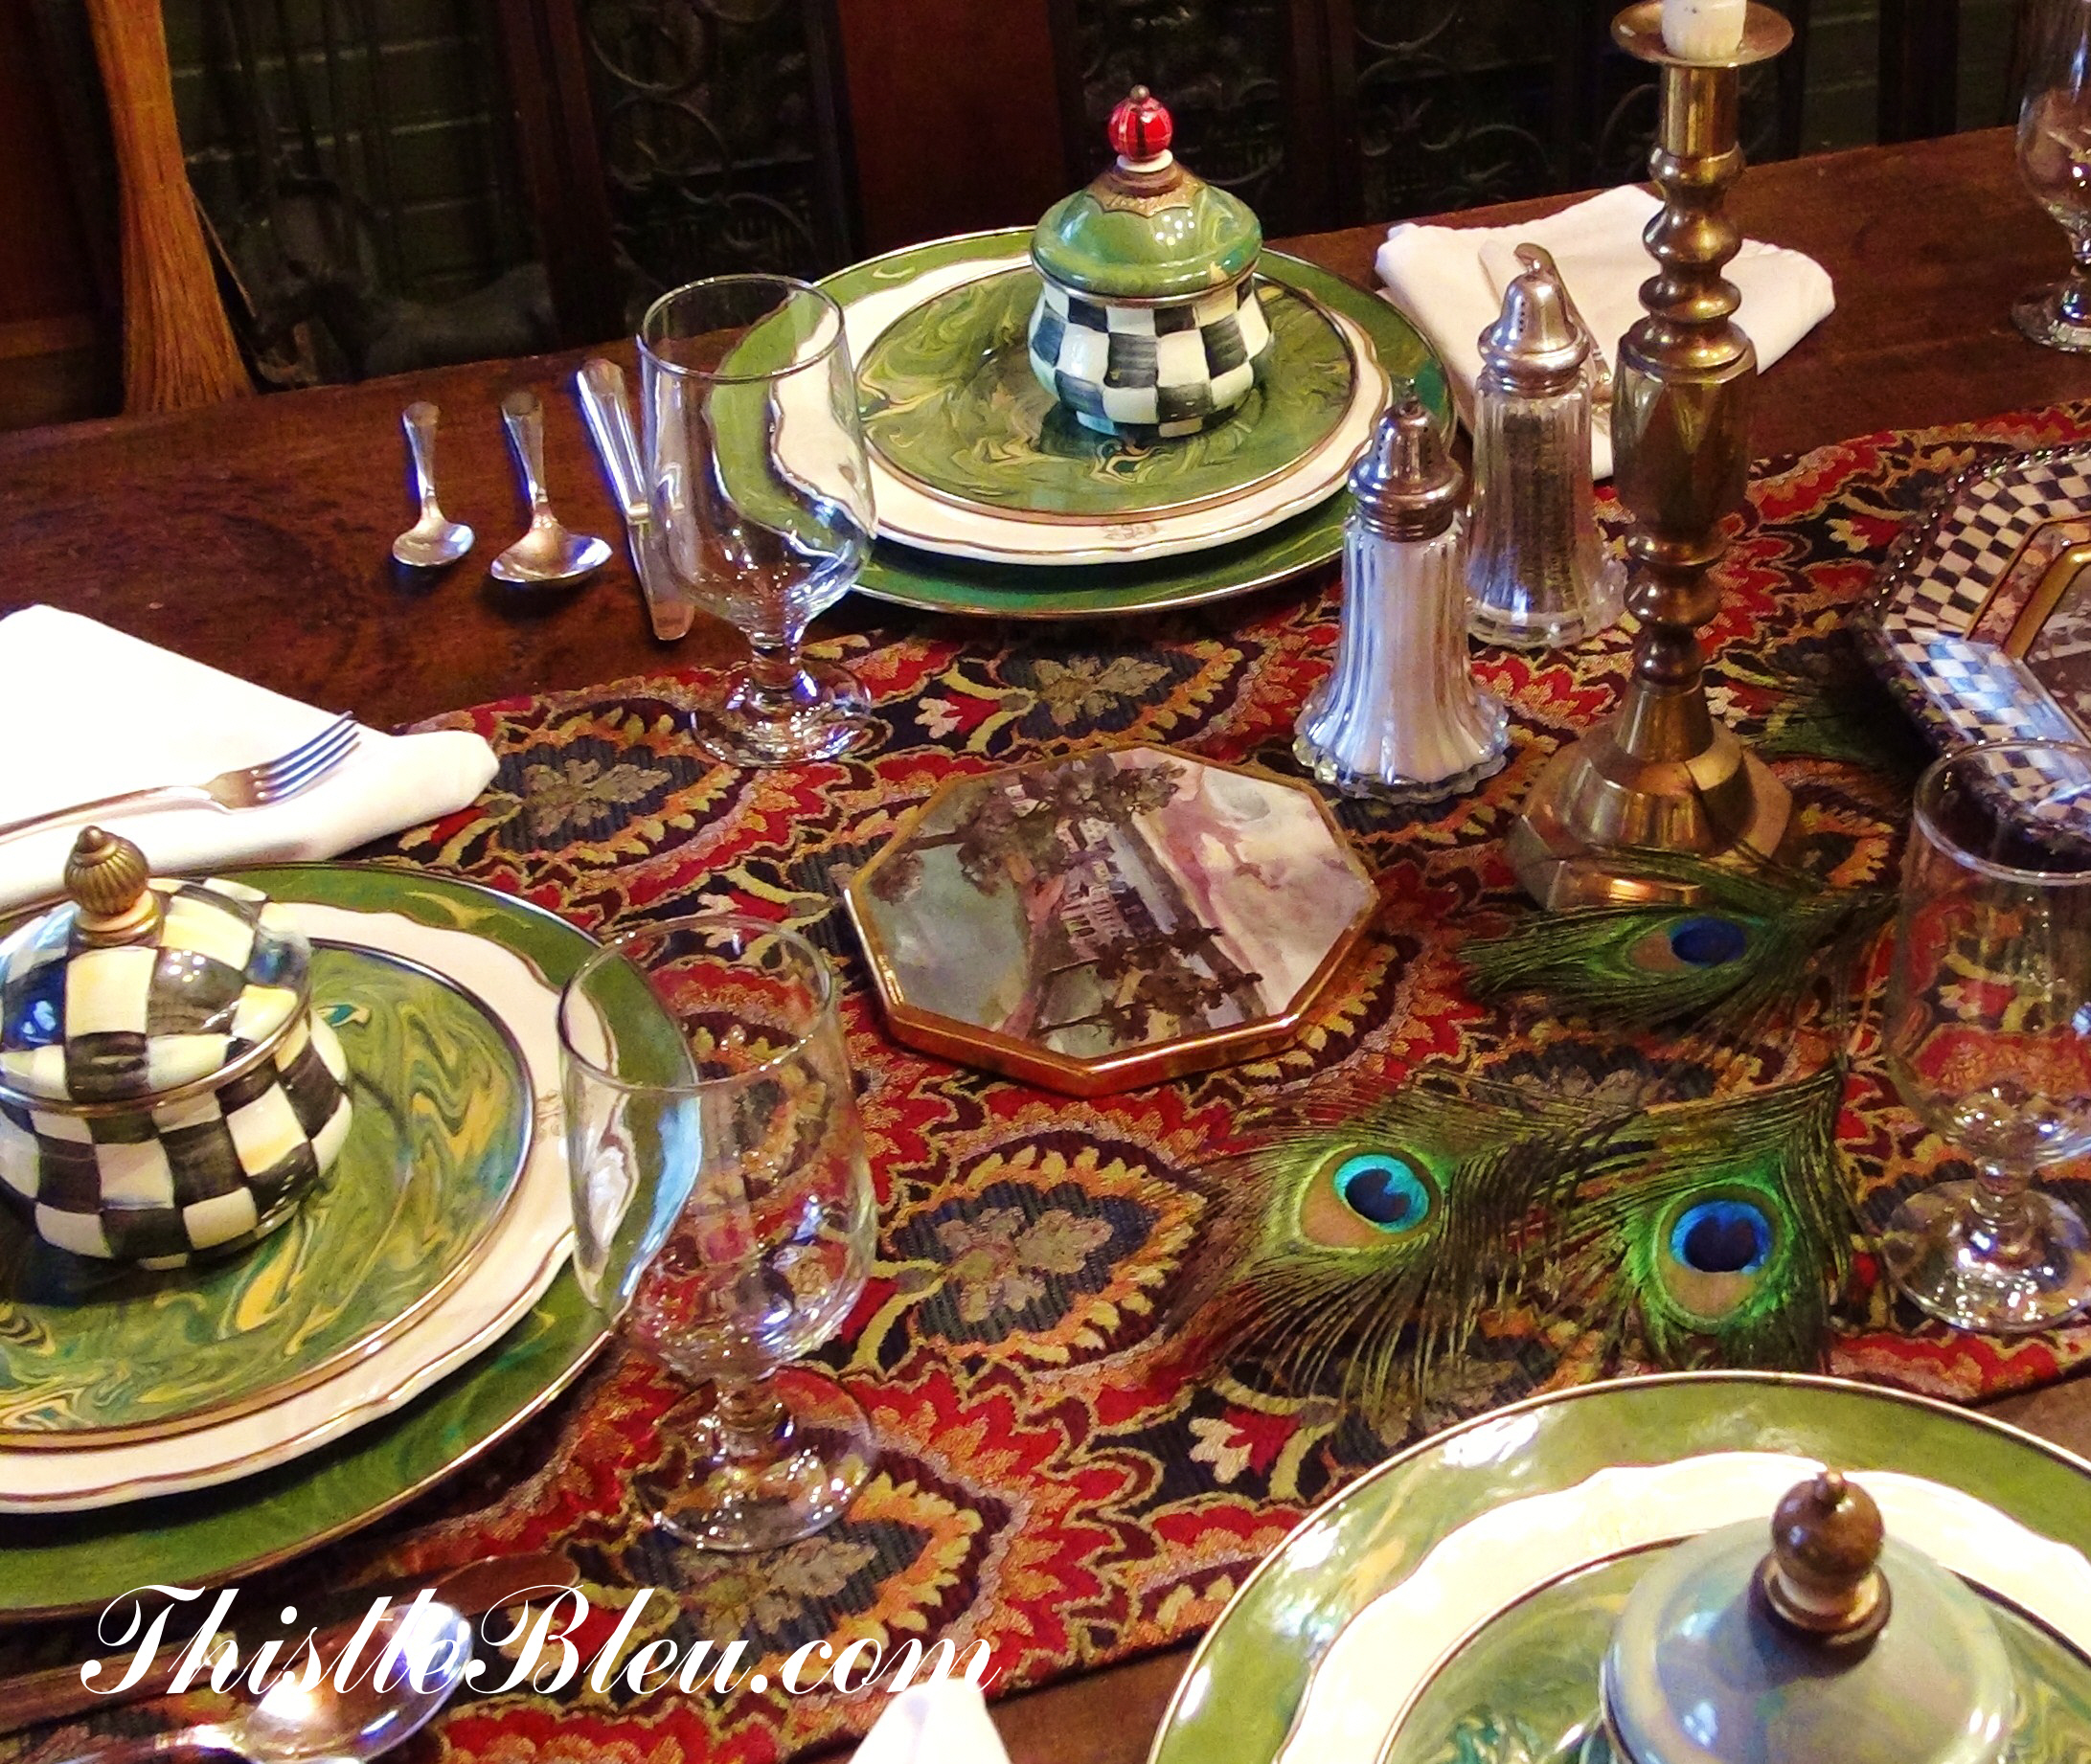
Sometimes you find a fabric that is just too perfect for a space. Yep, this was just shouting Mackenzie Child’s name so I decided it would make a great table runner for my sister’s dining room.
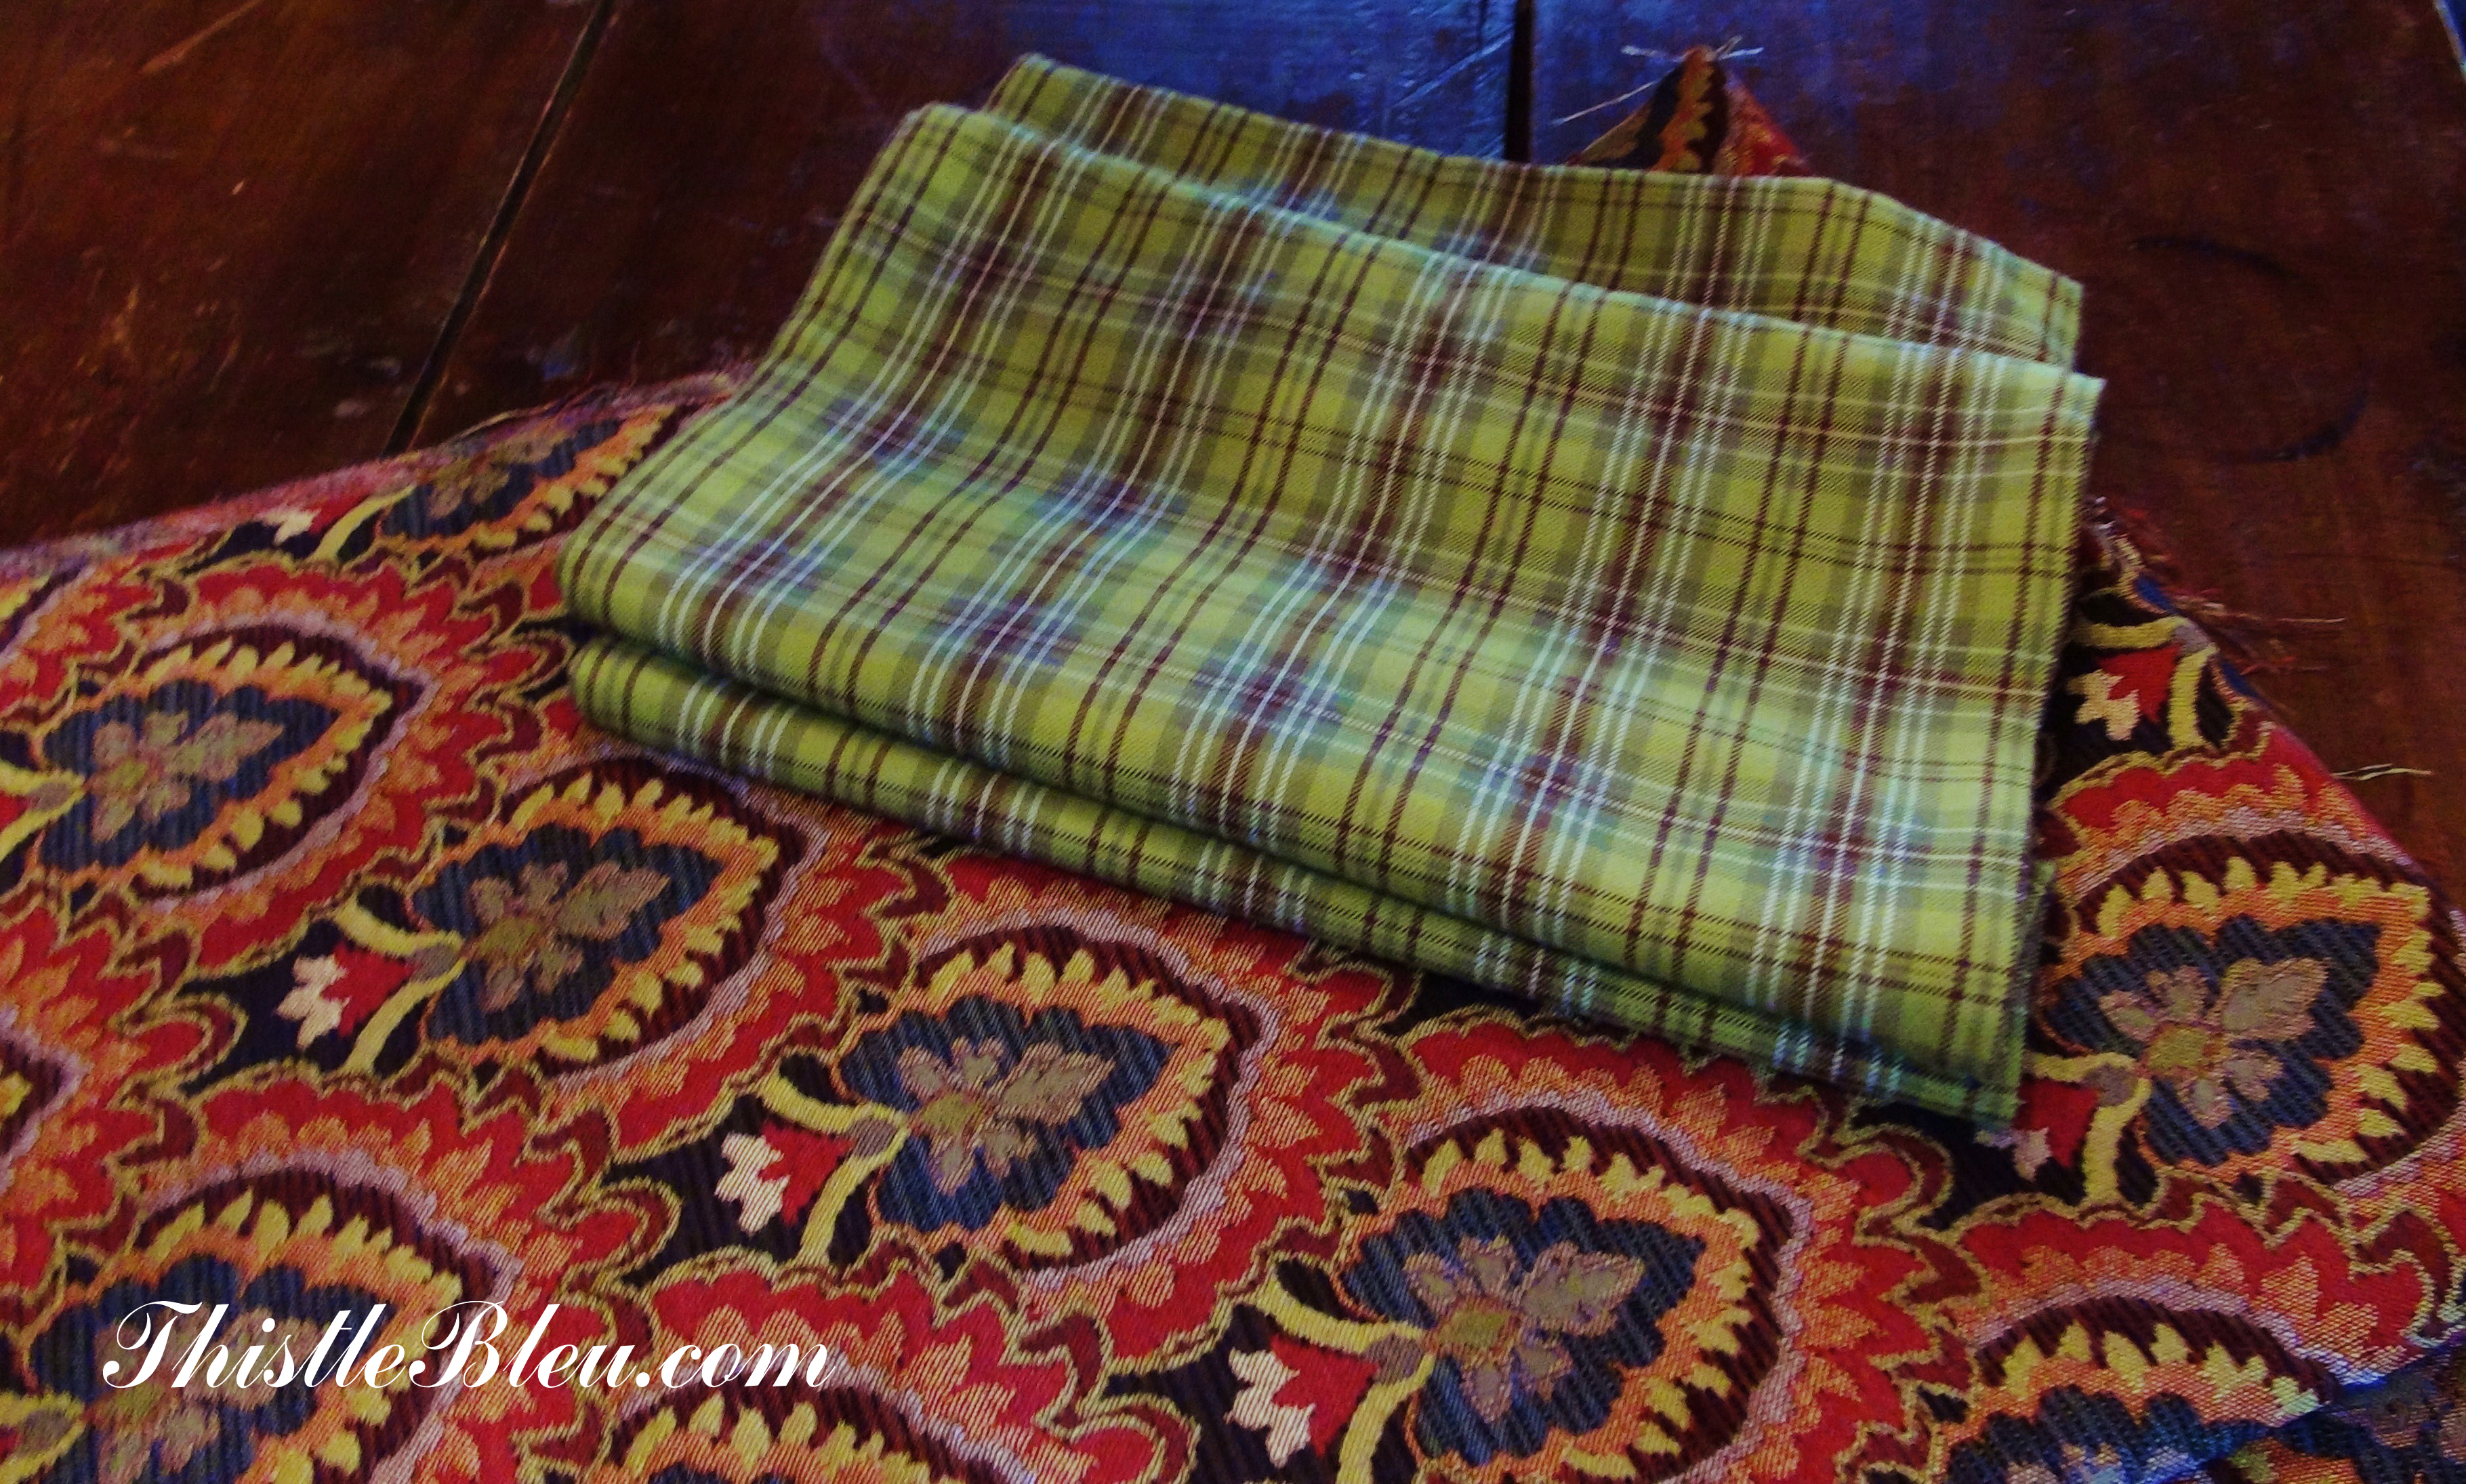
This Kelly green light weight wool plaid was a leftover remnant from another table runner so I used it for the lining.

Now the fun part starts with putting trimmings together.
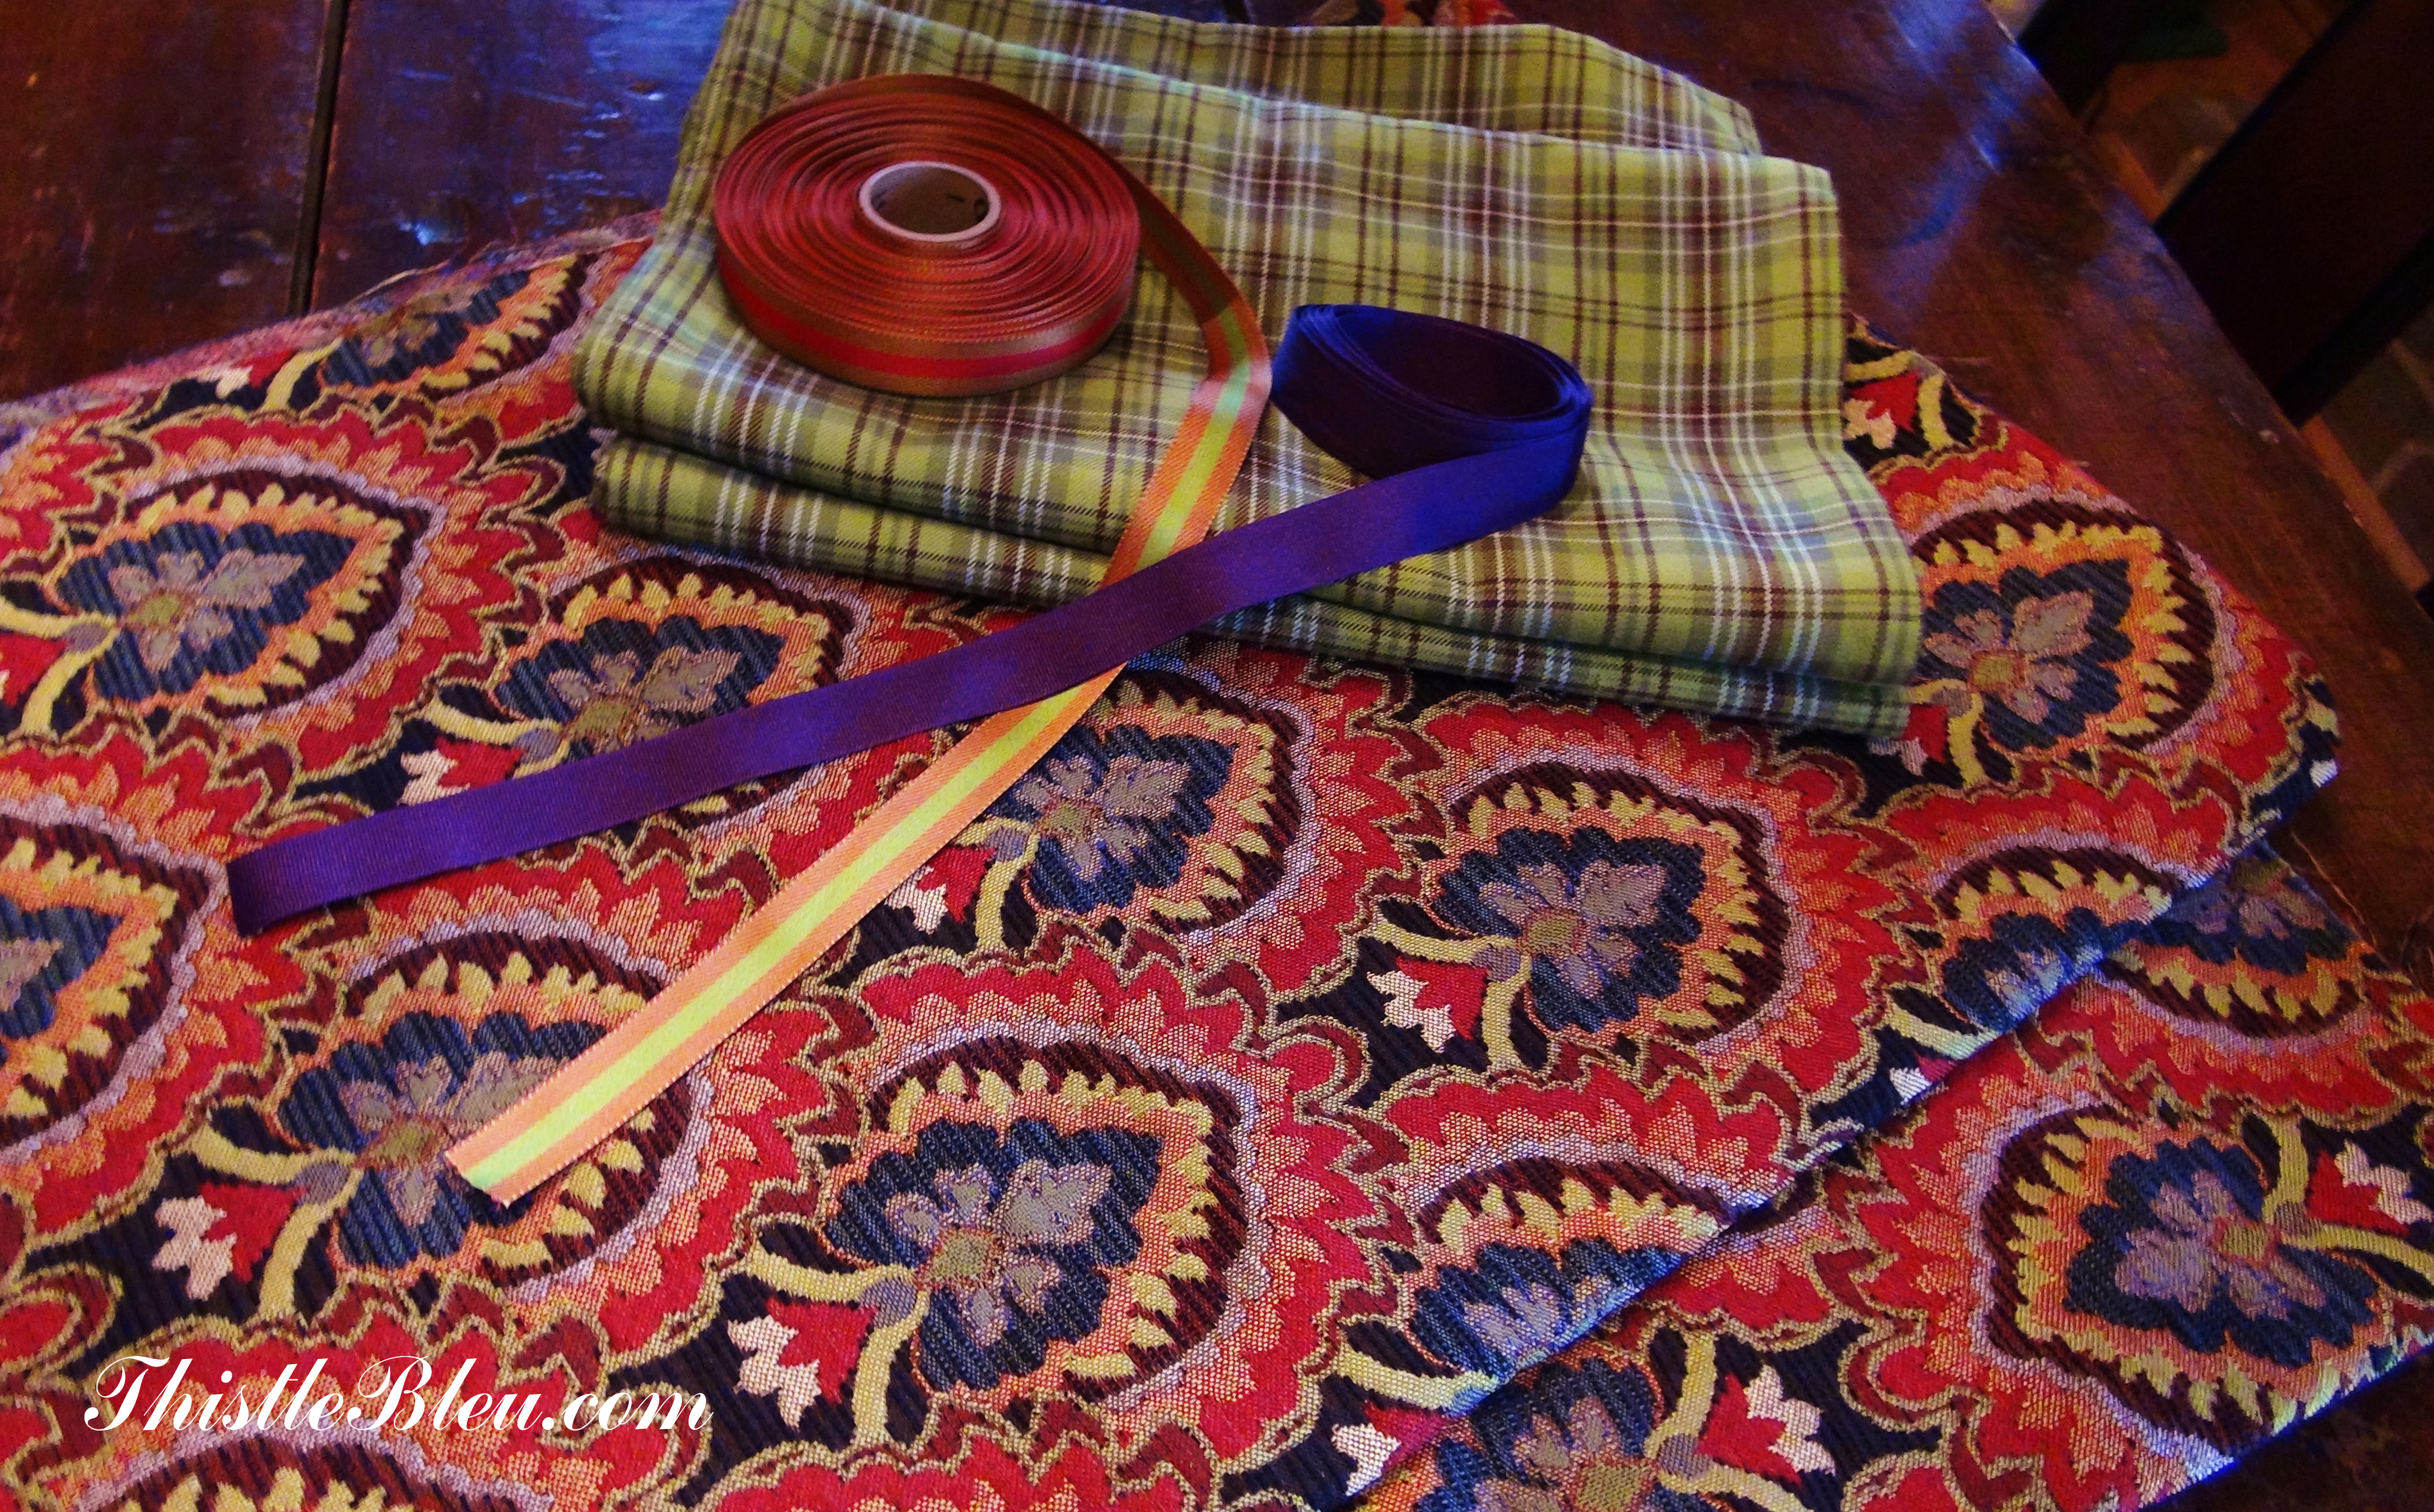
I pleated the purple grosgrain ribbon to give it some interest.

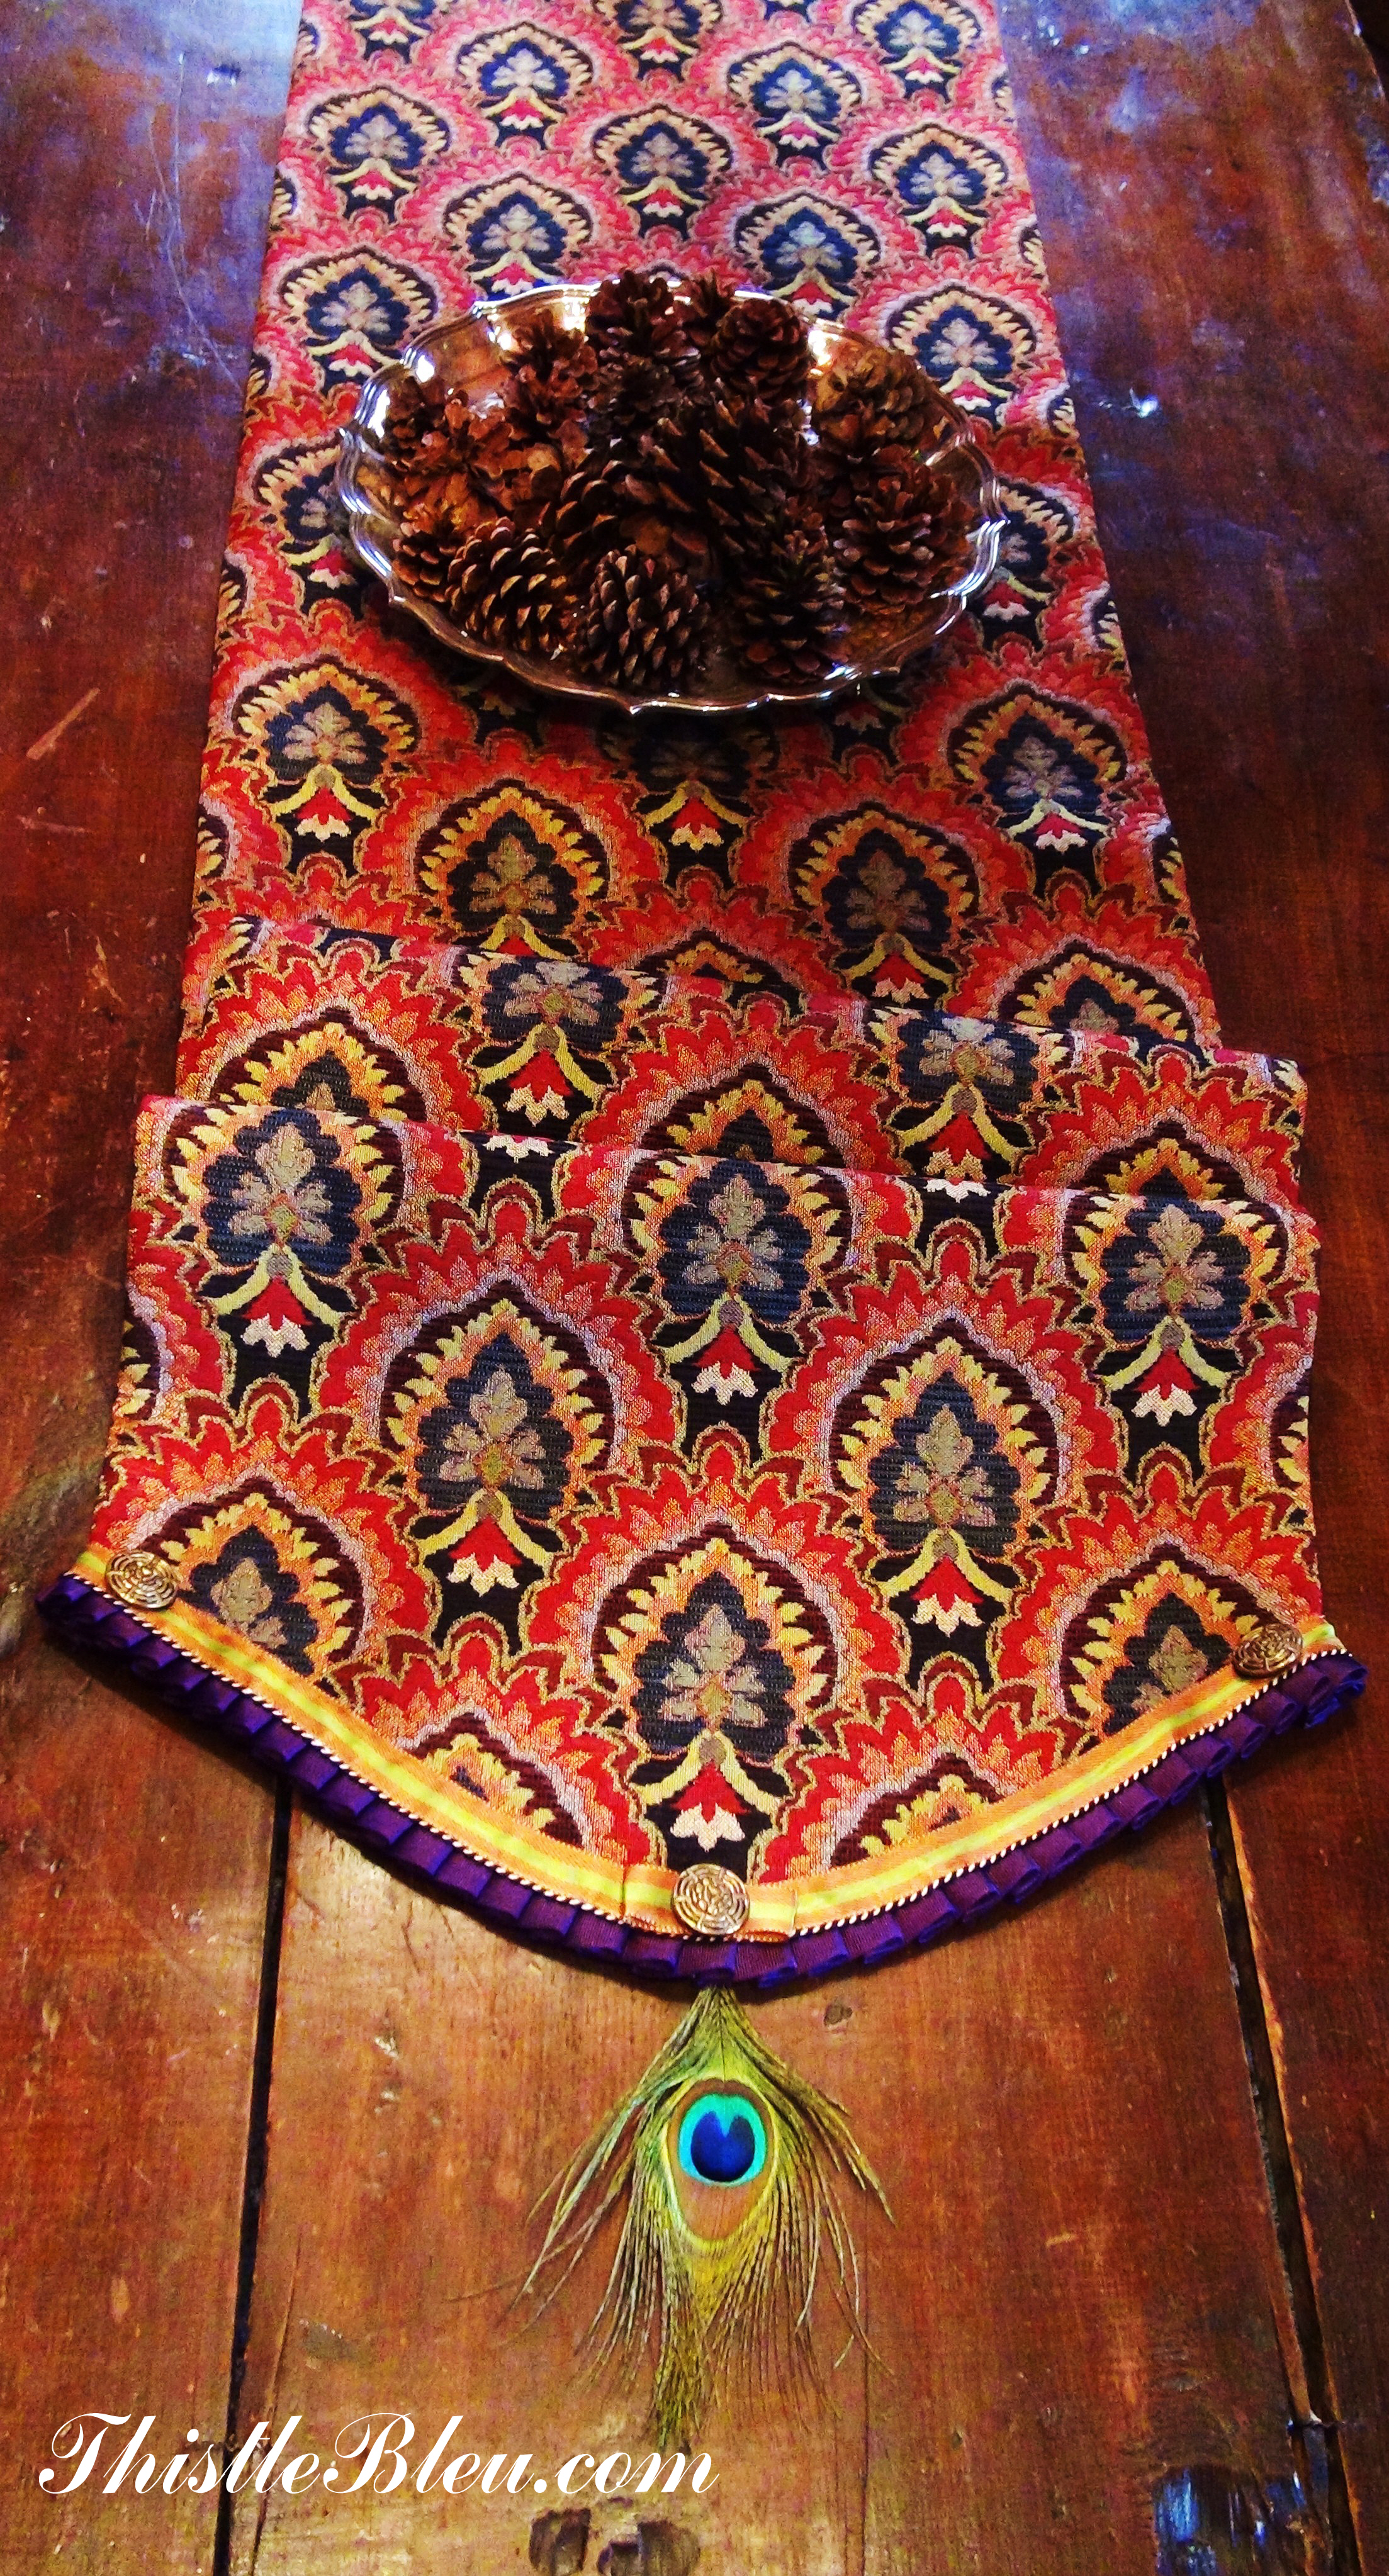
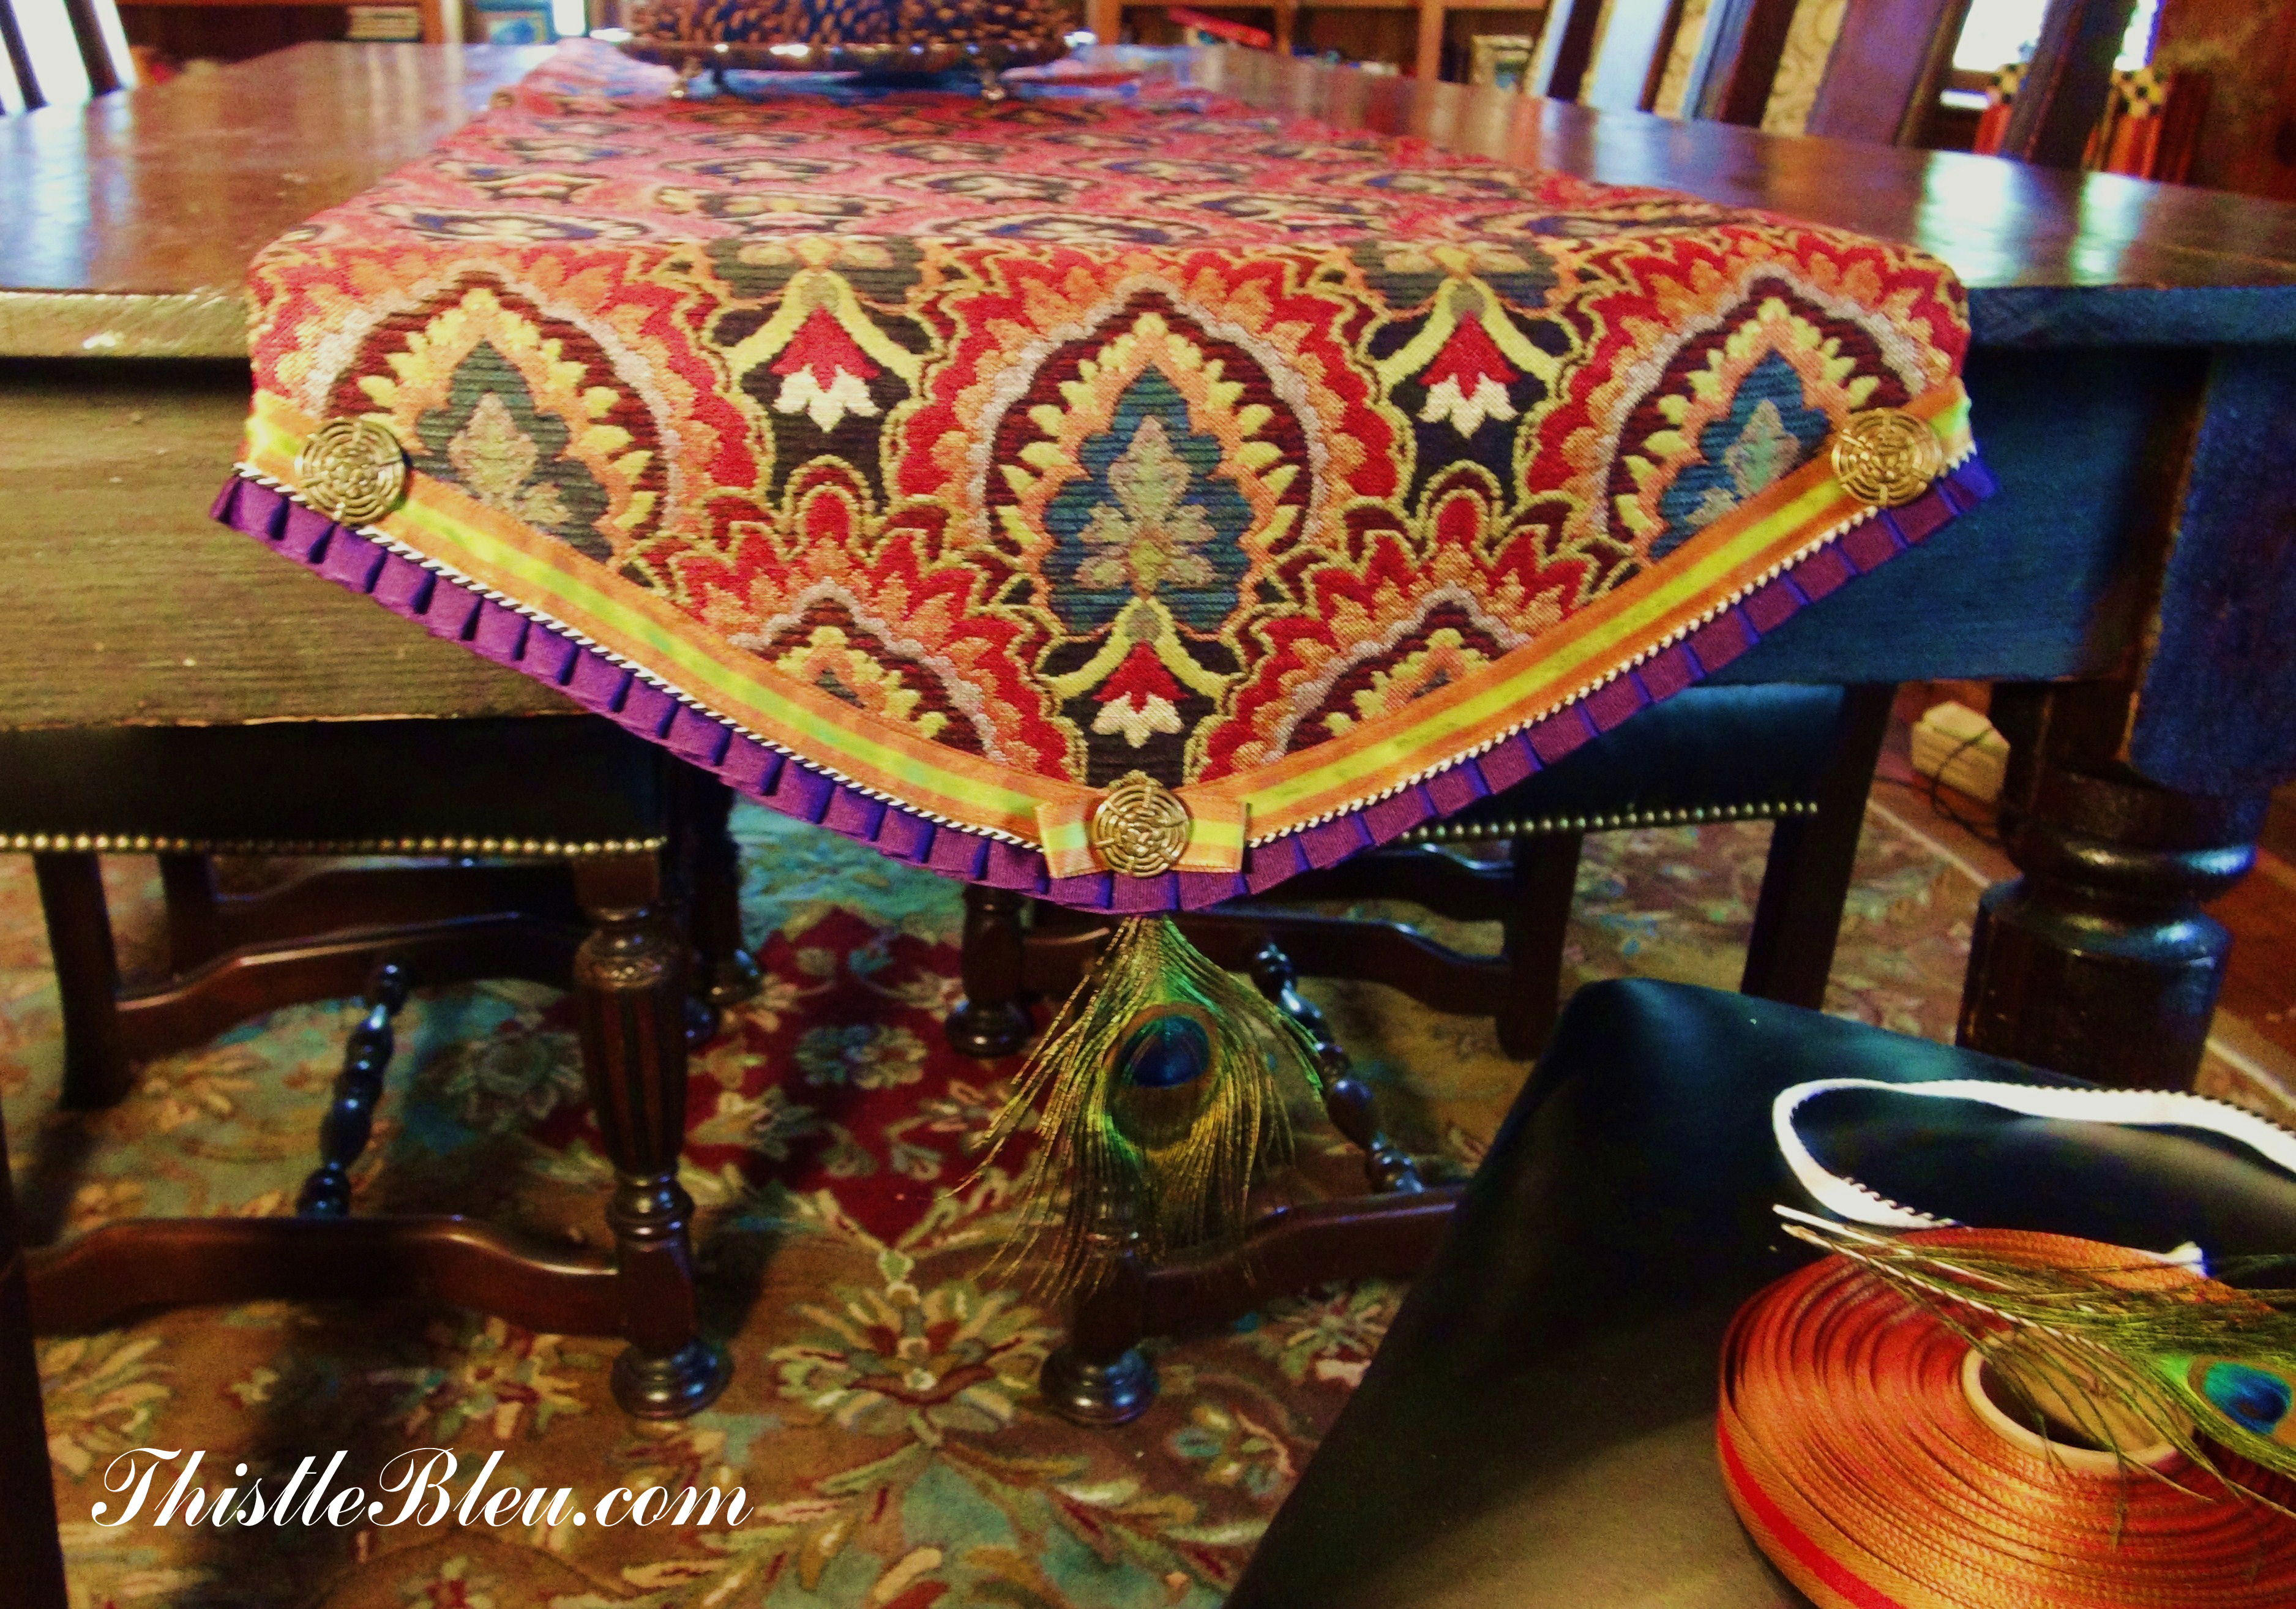
The black and white roping worked as an accent. Most of my trimmings come from Berwick Offray Ribbon Outlet Store in Hagerstown, MD. Most ribbons sell for about 10 cents per yard so I buy them by the bolt.

Oh yes, these old brass buttons from my grandmother’s button basket which was passed down to me would do just fine.

You really can’t go wrong with peacock feathers……the perfect embellishment for a Mackenzie Child’s inspired table runner. Back in the day when visiting the original Mackenzie Child’s there were always peacocks strutting around the grounds amid the pom pom headed chickens.


I use lidded sugar bowls for soup bowls. Clang, clang, clang…..the soup spoons against the metal bowls can be noisy with a full table of guests. I guess it is all part of the charm.
The table rarely looks like this. Usually the room has a bunch of teenagers crowding around the table with food everywhere. Those are the best memories that I have of this dining room.
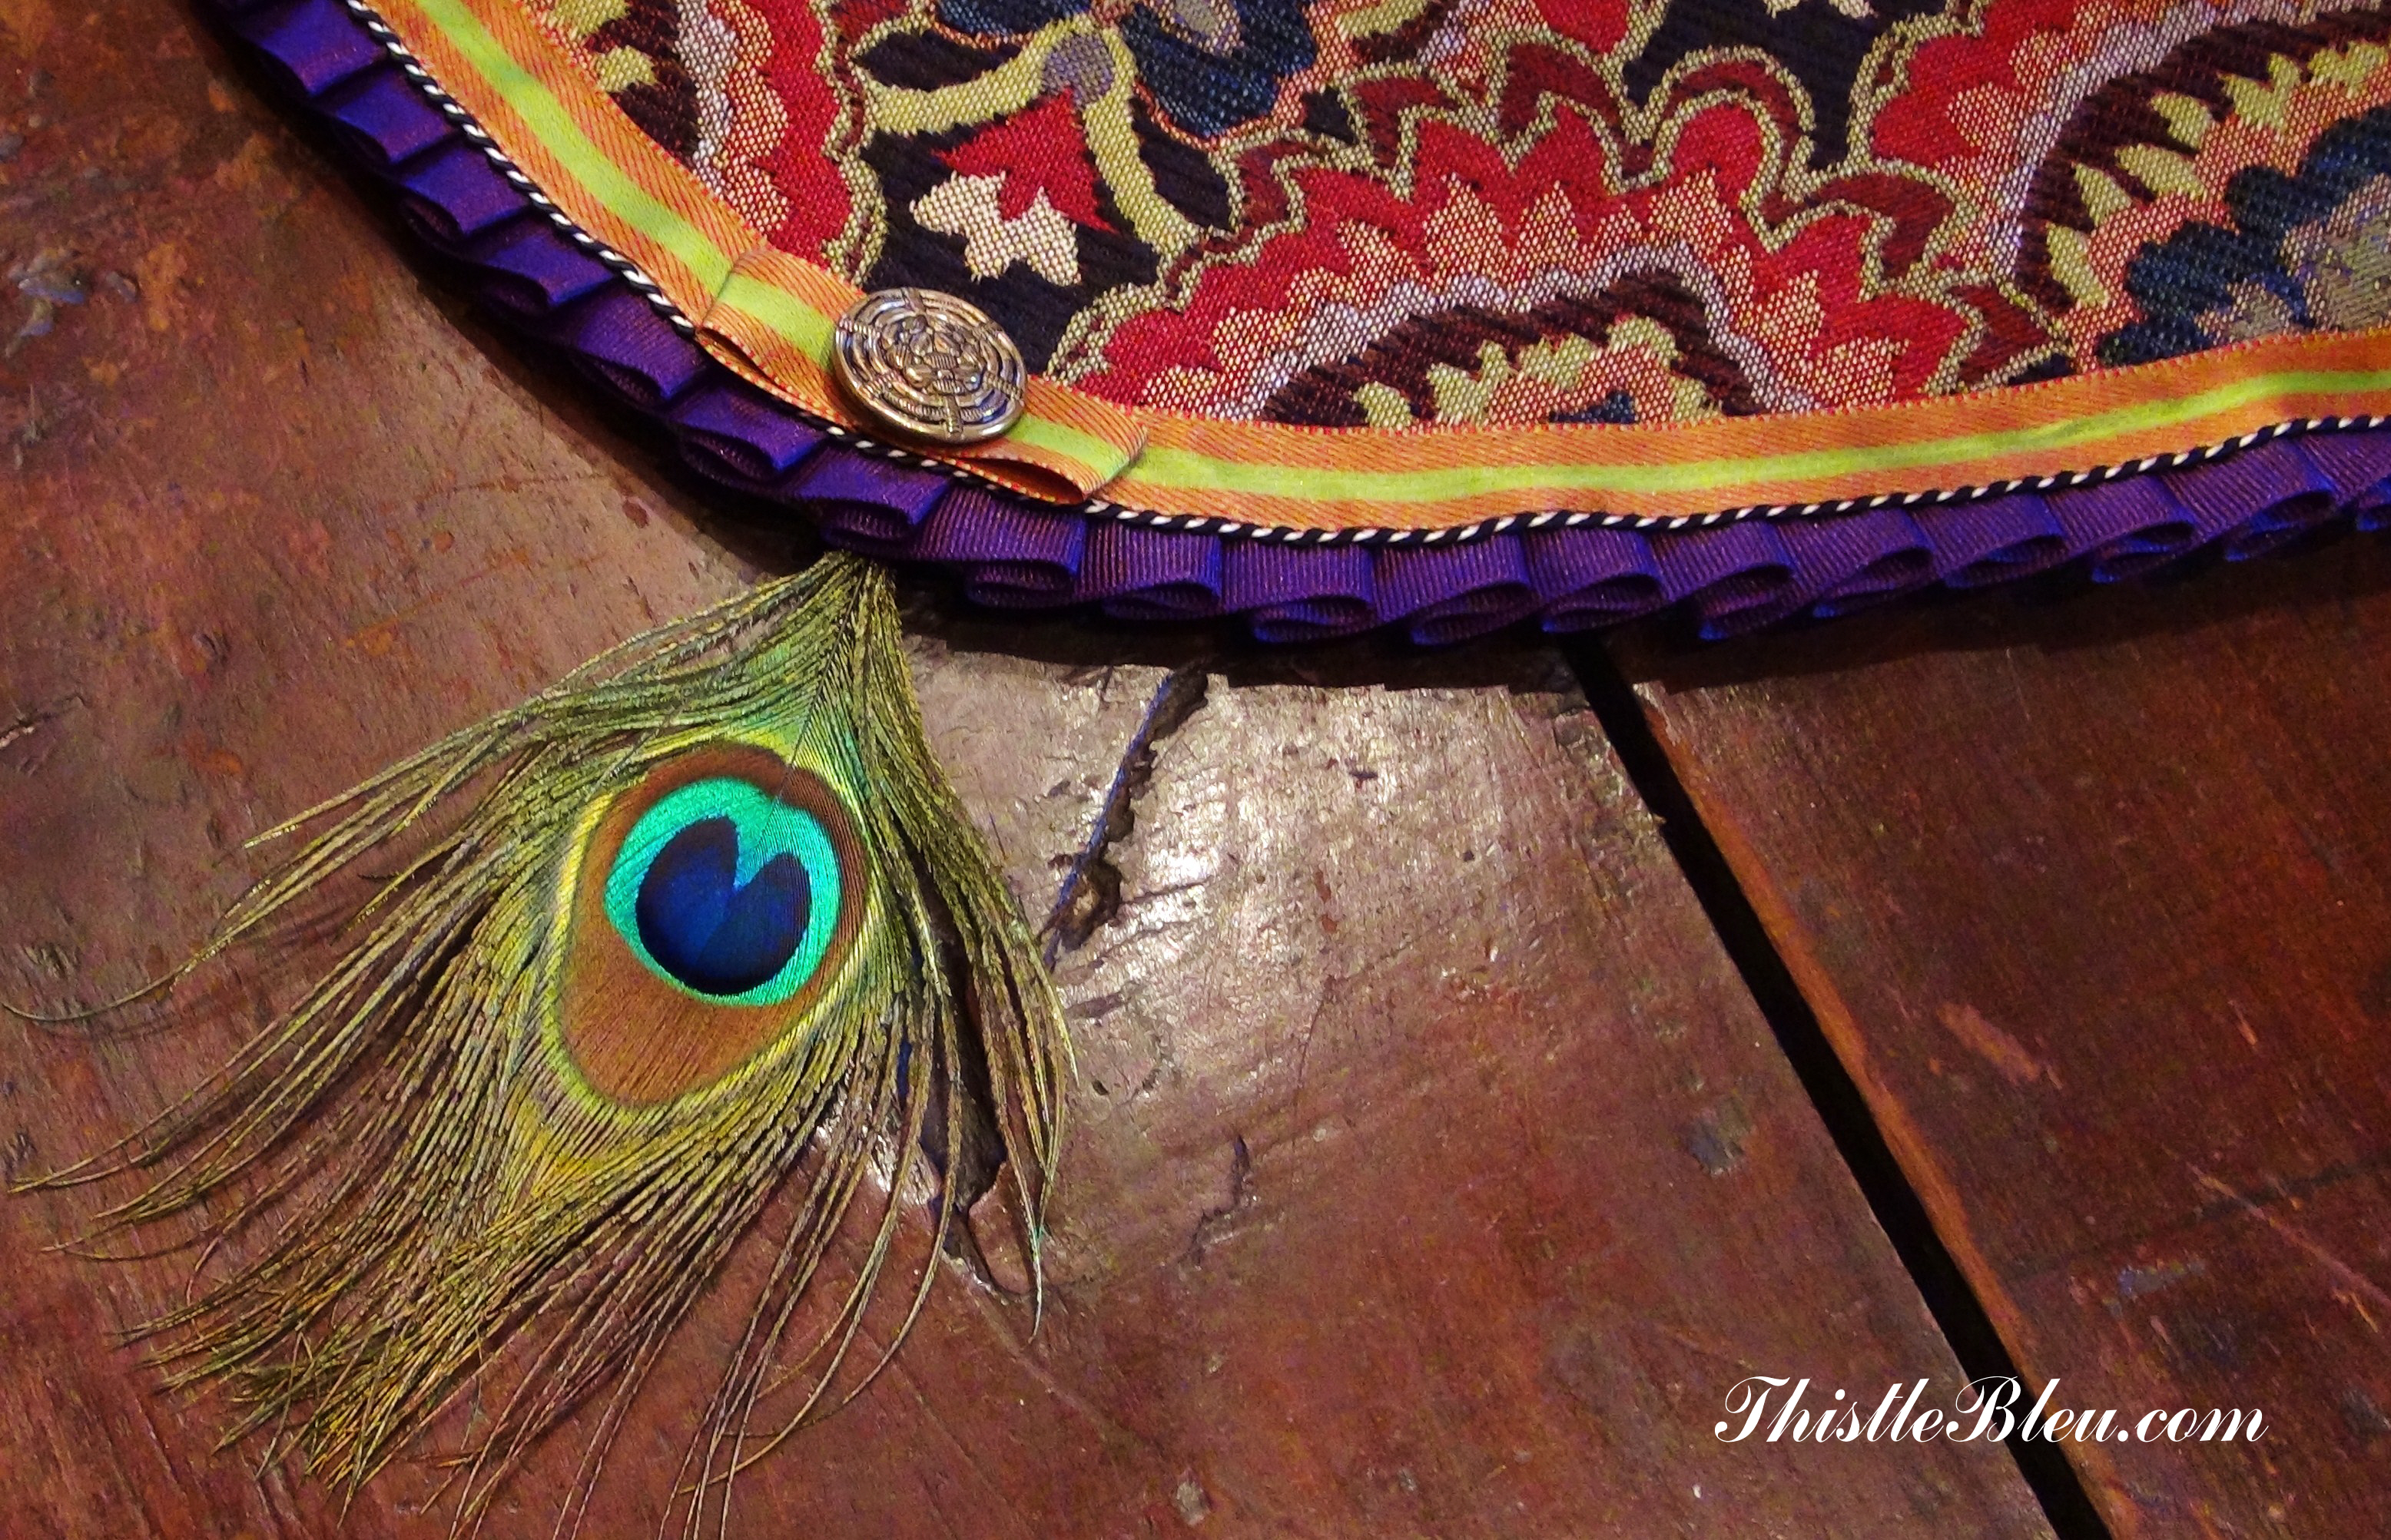
All finished off with a darling little bow and button.

I found this gem at a thrift store. It had great lines so I thought I would someday give it a go. I stored it outside in a shed for a year fearing that bed bugs had taken up residence in it. I replaced the foam and batting before recovering it.
I reupholstered the ottoman with this linen fabric resembling a French grain sack but it was a much heavier upholstery weight.
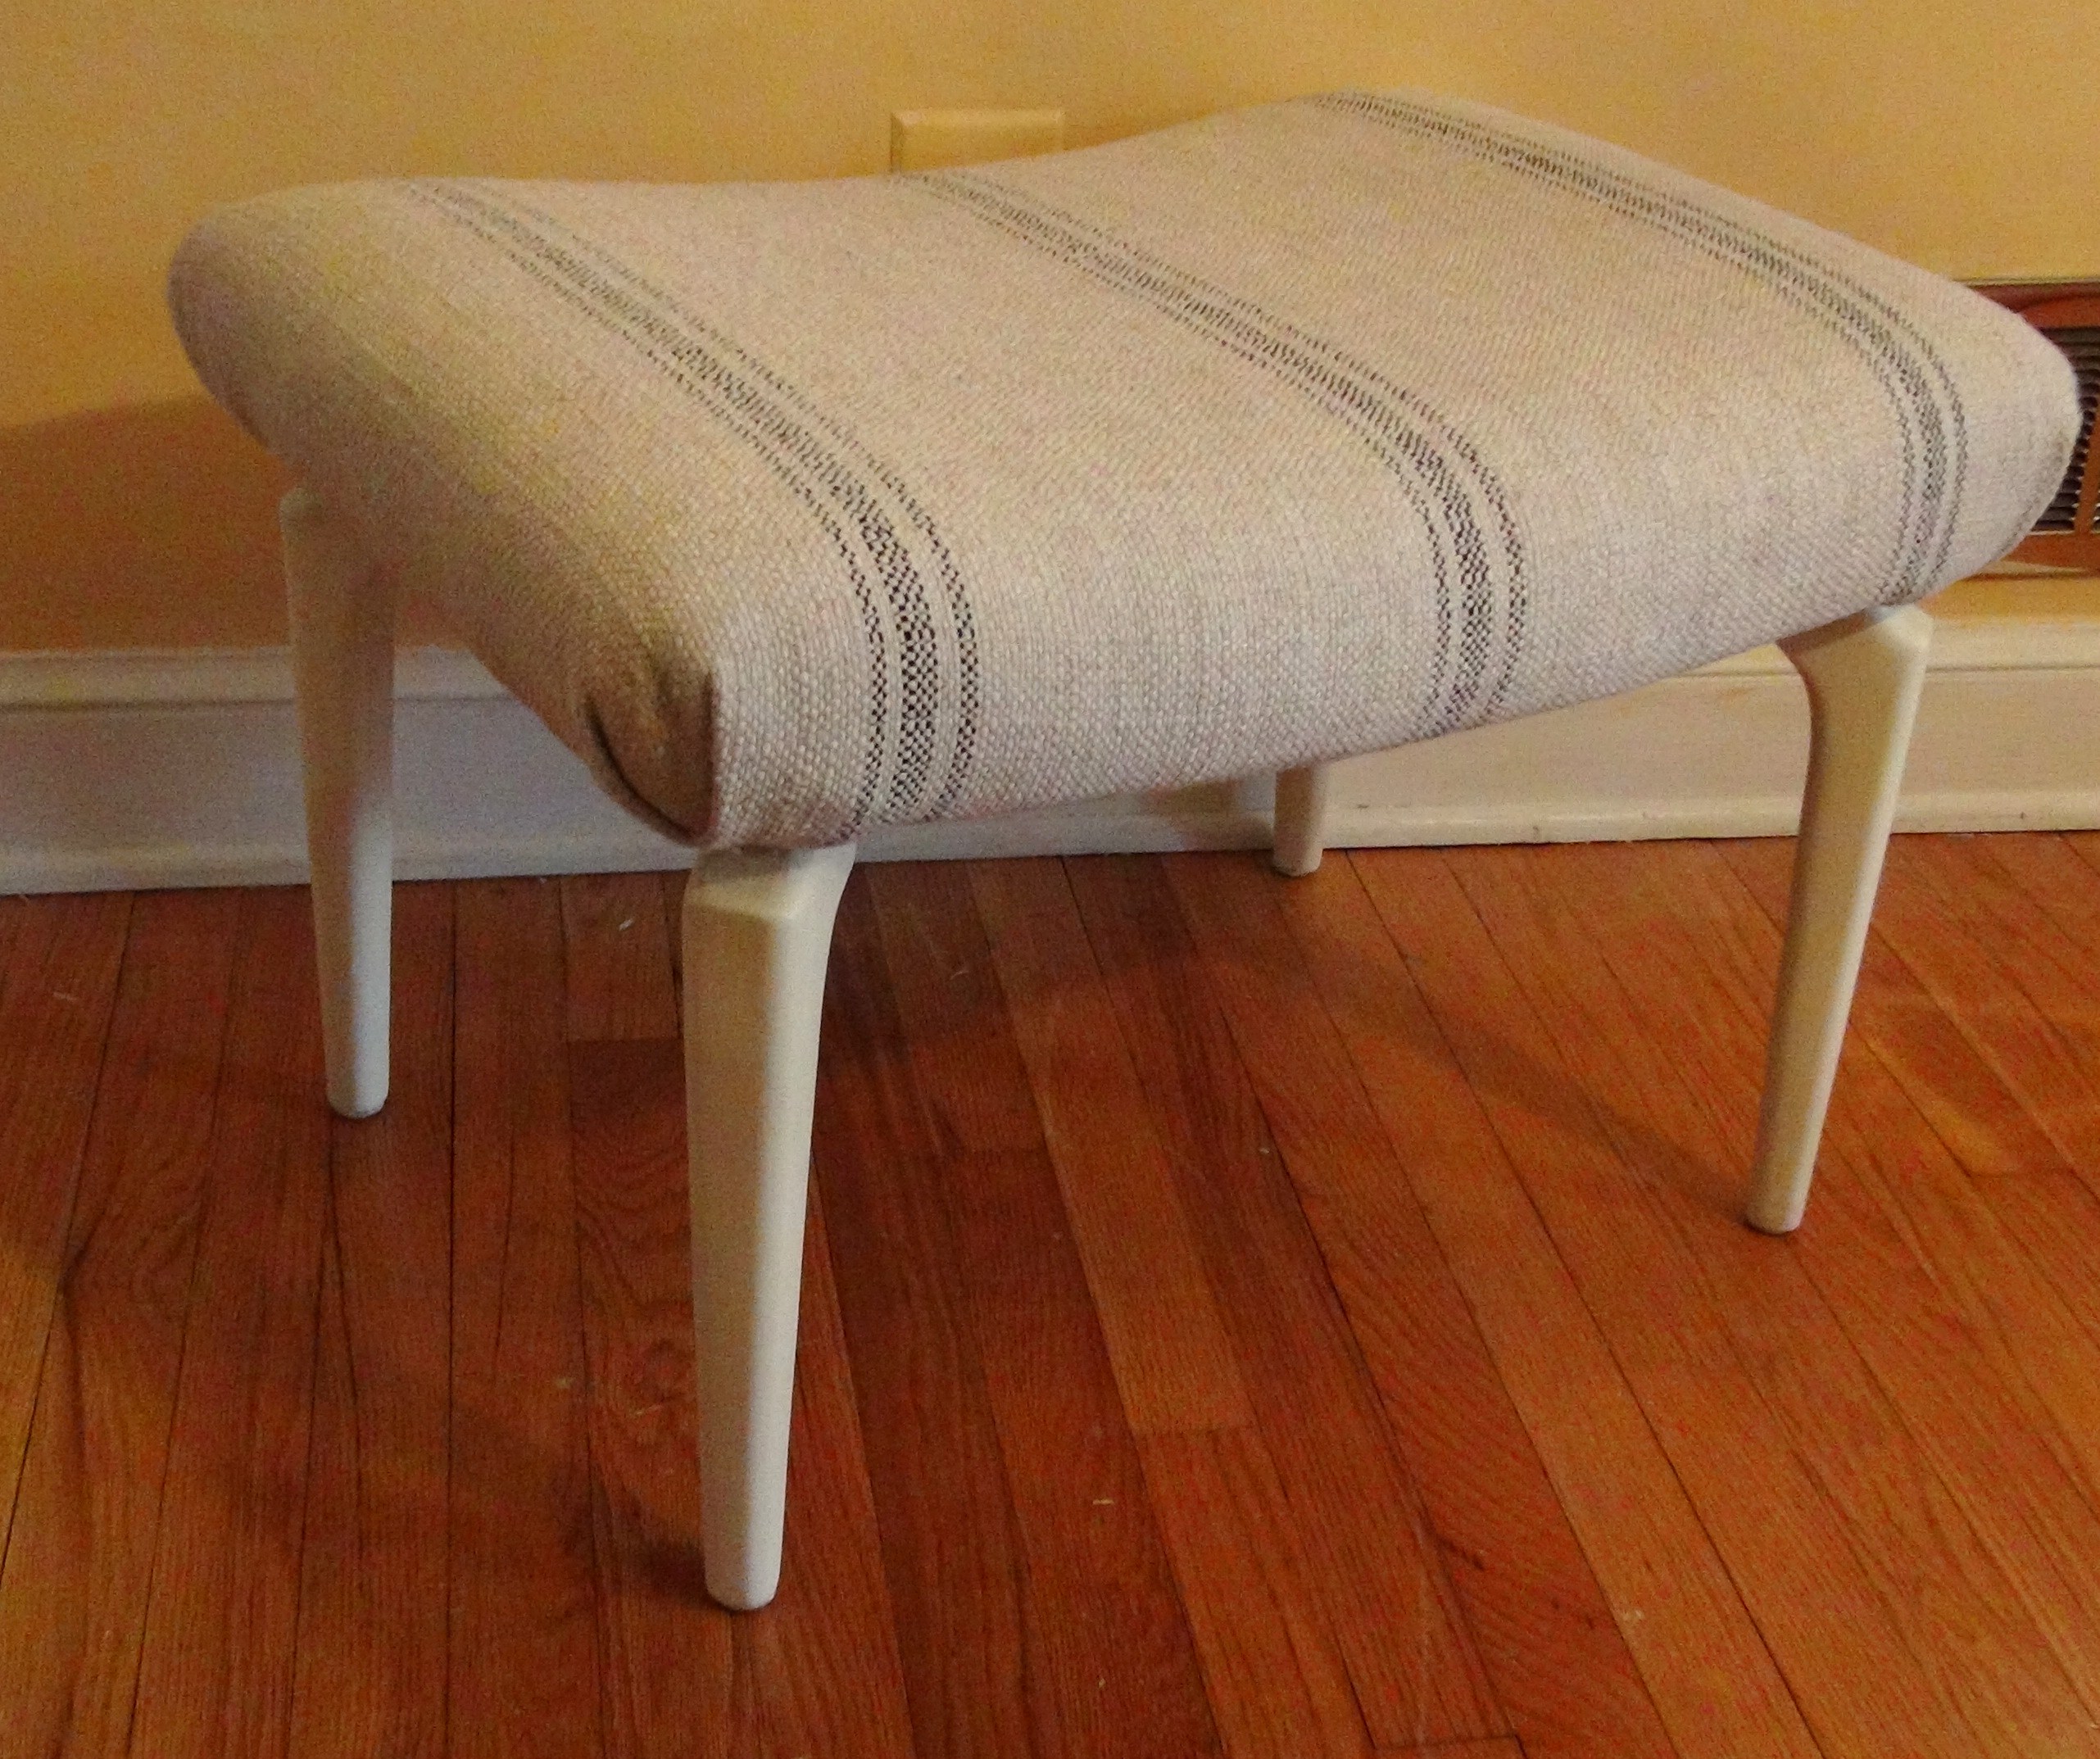
I painted the legs with Annie Sloan Old White with a Chateau Grey wash but it still needed something.

Aha…..a ribbon trim that was already pleated to embellish the ottoman!

I used a hot glue gun to attach the ribbon. You will have much better control of the bead of glue if using a small hot glue gun instead of a large hot glue gun. I learned this the hard way after burning my finger when frantically trying to peel off a large glob of hot glue.

The ribbon really was the jewelry that set this grain sack upholstery apart from that catalog look. This was a Christmas gift for my niece.
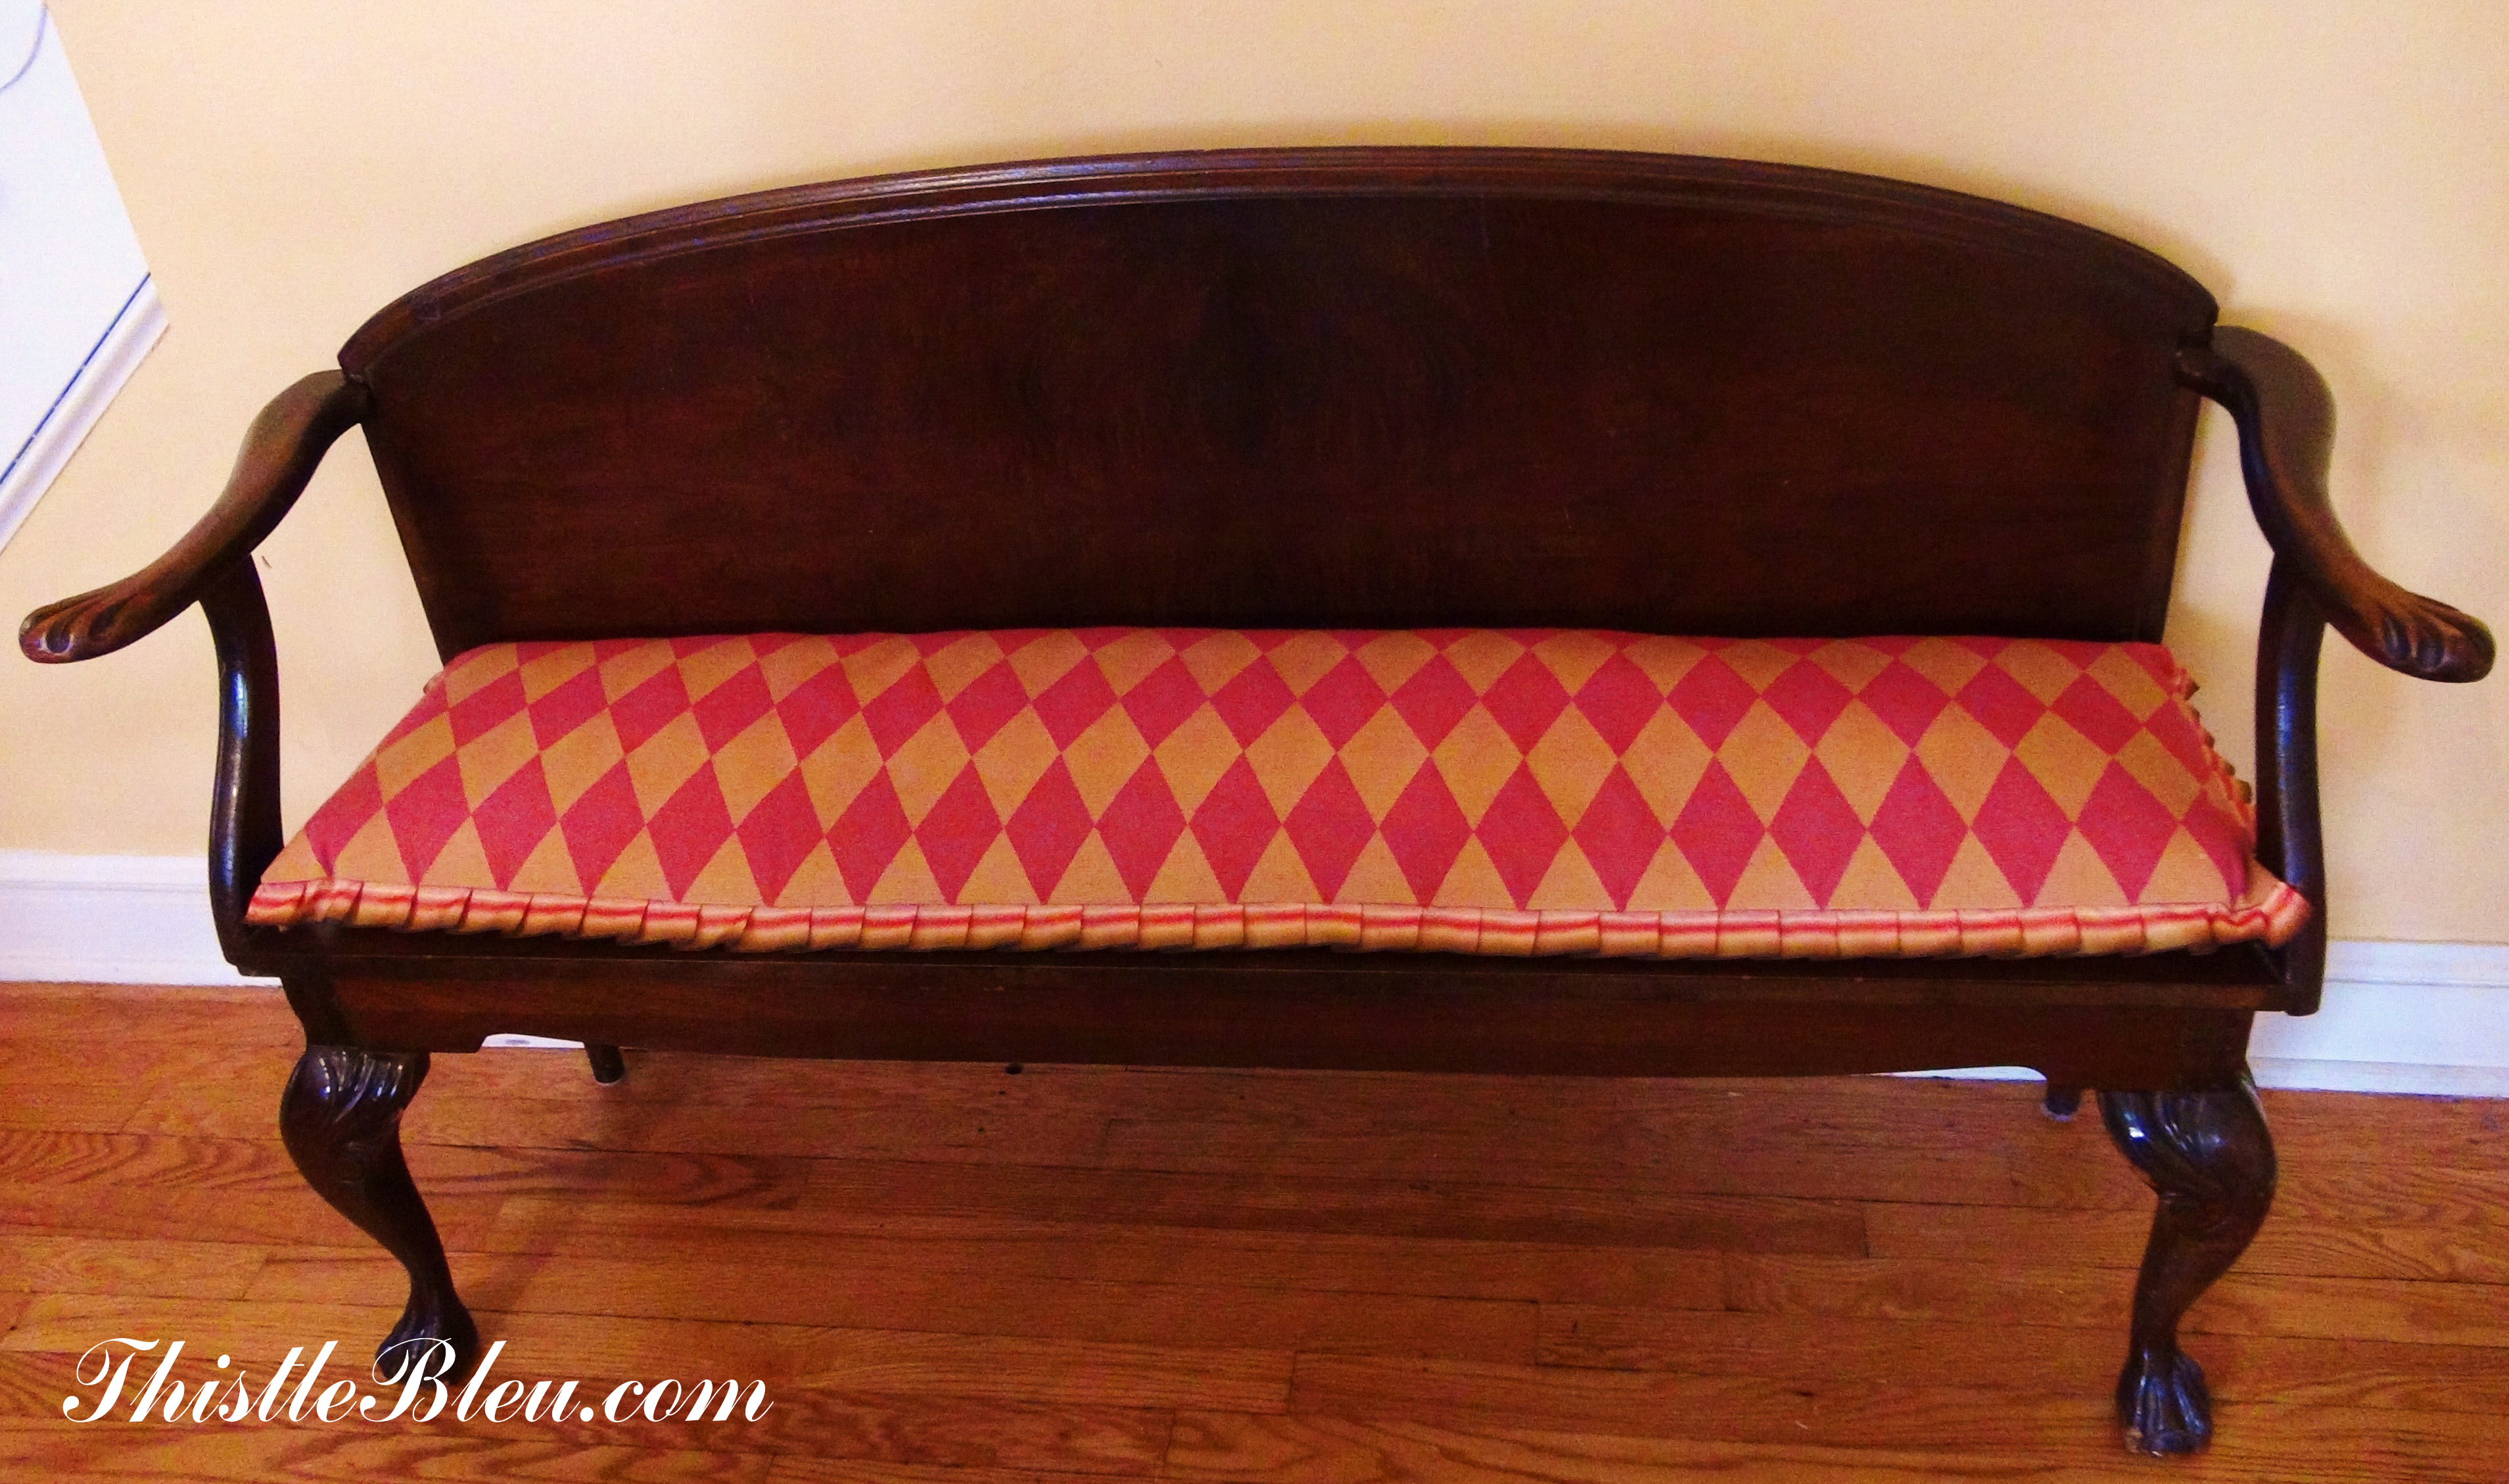
I found this bench years ago at a flea market. The back is a headboard which is married to the arms and legs of what was once a nice old chair.

The ribbon was wired so I removed the wire and pleated it. I find that a lot of ribbon that I really like is wired. If you give it a yank, it pulls right out. The cushion was made with recycled feather bed pillows. The patio looked like I had just plucked a chicken after stuffing the new cushion!

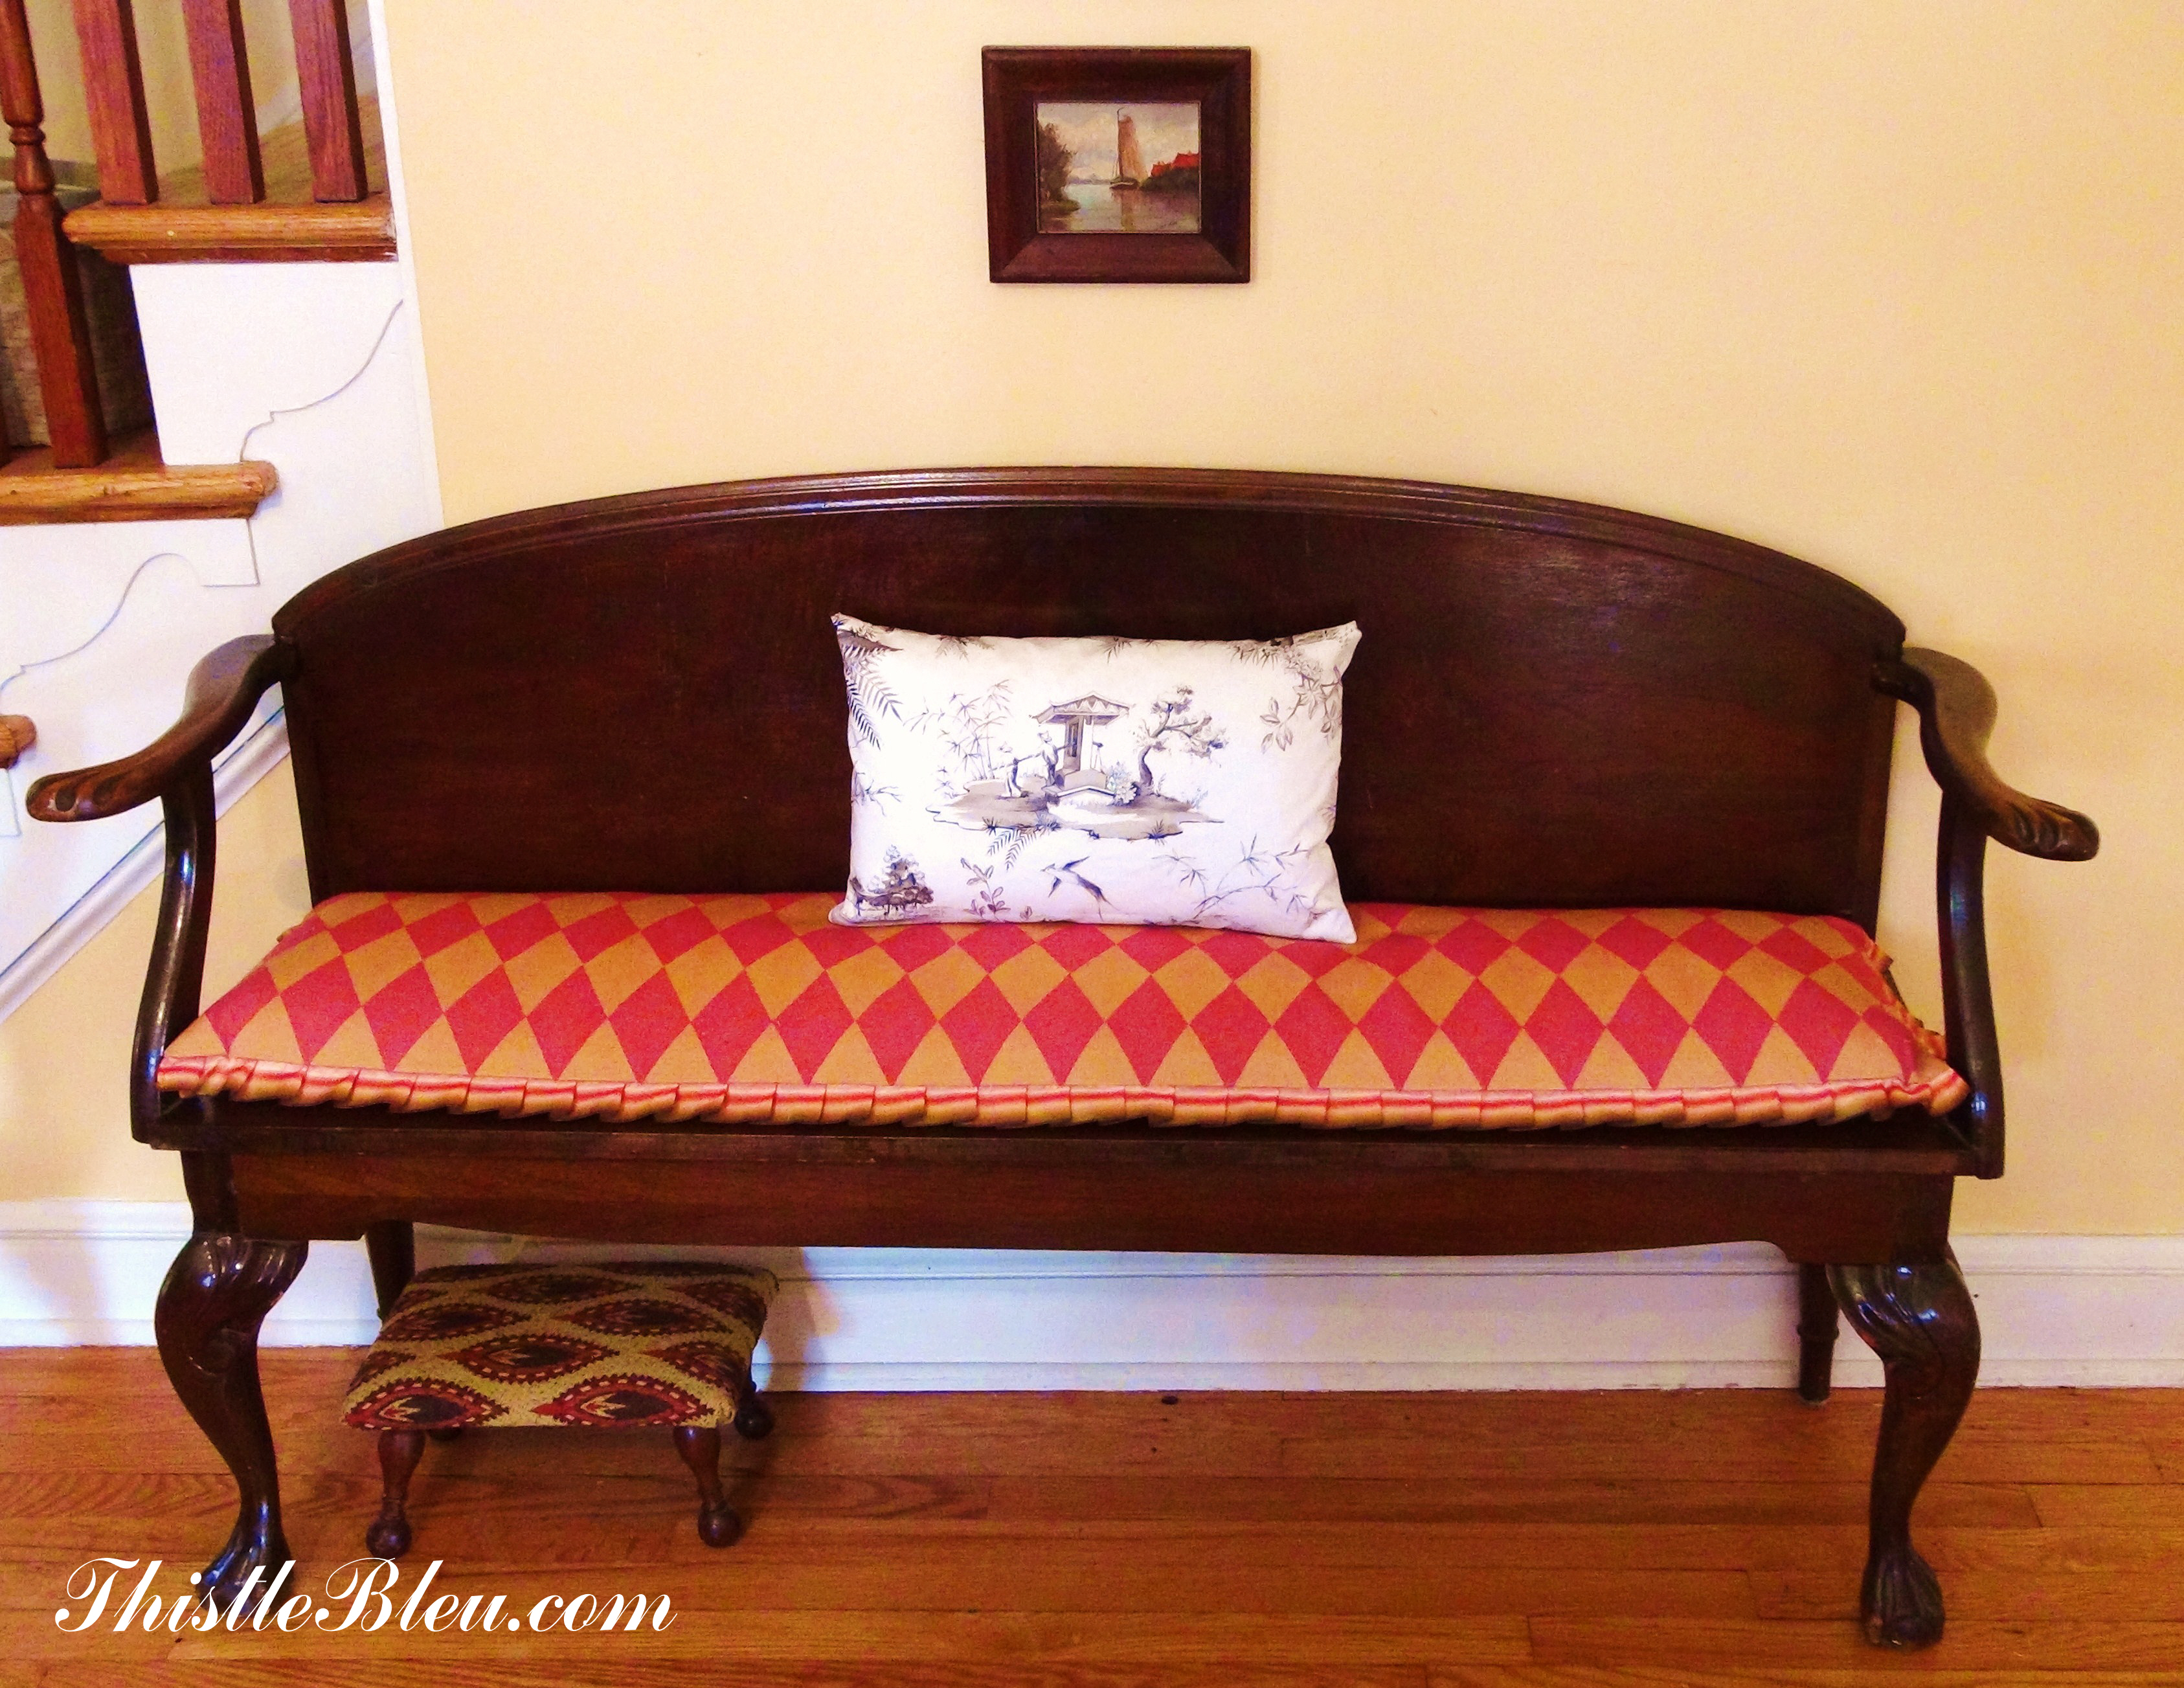
If I knew how to wield power tools I think I would make more of these headboard / chair benches. Maybe I should look into a class at the local hardware store. You could get really creative.
If you don’t have a pleater or a sewing machine with a pleater you can pleat the ribbon by hand. If you make a cardboard pattern to start out making your folds you will eventually be able to do this by just eye balling the pleats without a cardboard guide.


 Wrap the ribbon around the cardboard guide and insert a pin (yellow pin).
Pull out the guide and line up the folded pleat along the 1/2″ line. Wrap the ribbon from behind the loop around the guide and insert a pin (white pin).

Pull out the guide and repeat the process. Line up the folded pleat along the 1/2″ line. Wrap the ribbon from behind the loop around the guide and insert another pin (blue pin).
Before you know it you will be able to pleat the ribbon with no guide.
~ Lynette

I am very impressed by Silas’ paintings…saw the photos of them that his grandma (Dotty) had when she was here visiting. I also am enjoying your decoratimg ideas.
I would love to see more of your son’s artwork! Wow the table runner (and tablescape) look fantastic! I have lots of things around here that would look soooooo nice with pleated ribbon trim! 😀
xo,
Ricki Jill
We also love seeing your beautiful artwork that you put up on your blog! And of course all of your Mackenzie Child’s tablescapes.
Lynette,
Are you okay? I miss hearing from you!
xo,
Ricki Jill
You have great ingenuity and skill Lynette. Plus beautiful results!
Wish we could have seen the art exhibit.
Those are really impressive work of hand! You and your son both have the blood of a master artist and crafstmen. Looking forward to see more of your works.
Thank you for your generous comment. Glad you enjoyed it.
Hi Lynette,
Just wanted to leave a note here, letting you know I have more of the MacKenzie Childs inspired Thistle embroidered dish towels ready.
https://www.etsy.com/listing/457256826/mackenzie-childs-inspired-embroidered?ref=shop_home_active_1